

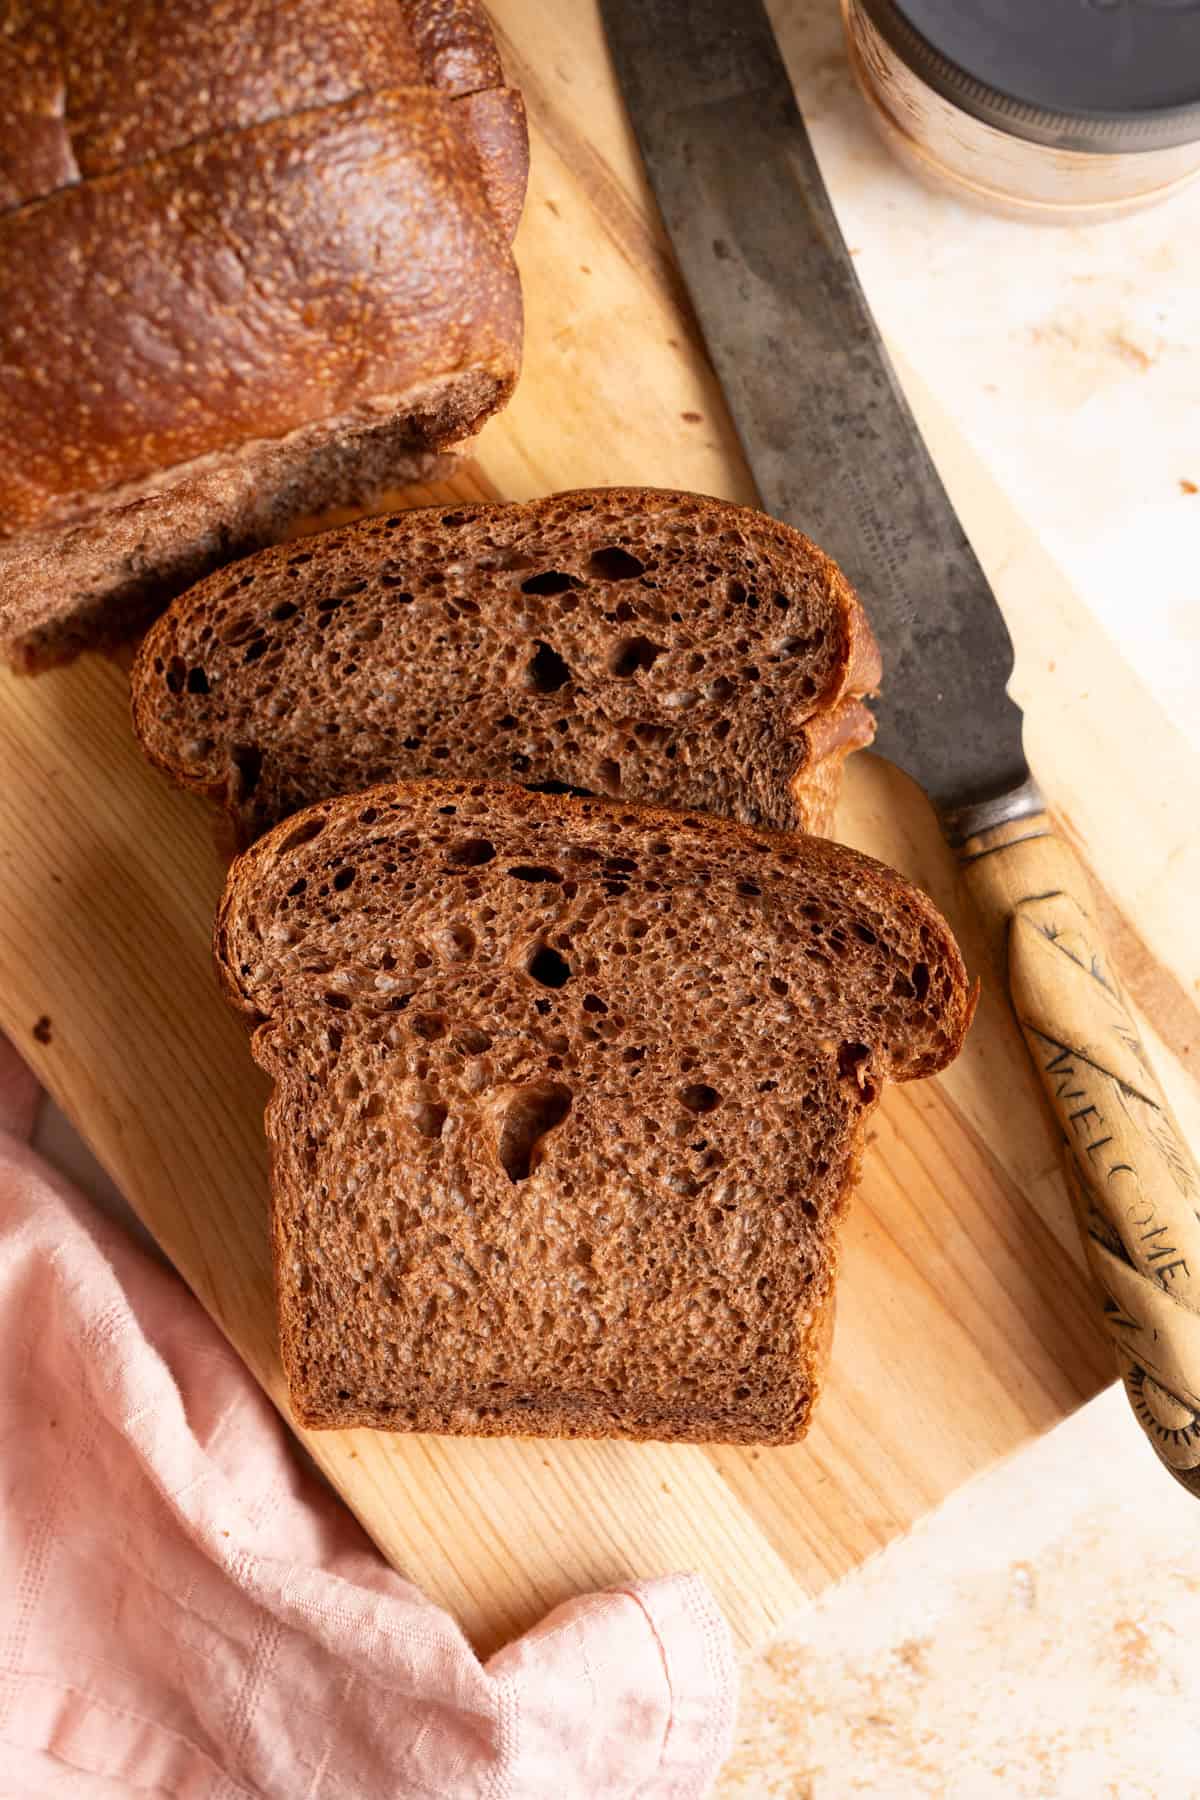
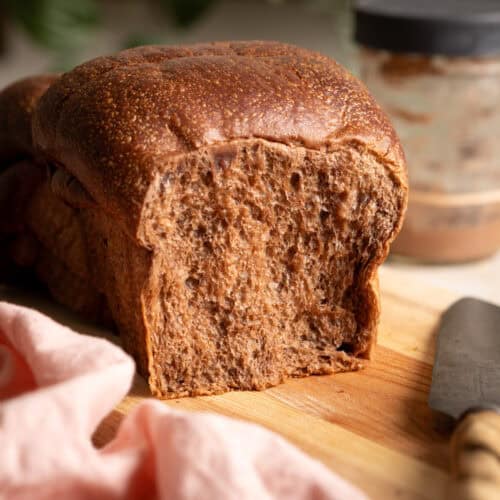
I may not be able to give you a chocolate pillow to sleep on, but I can give you one to eat! This chocolate sourdough milk bread is unbelievably soft and fluffy, with a rich dark chocolate flavor, a subtle tang from the sourdough starter, and just the right amount of sweetness that makes every slice feel like a treat any time of day.
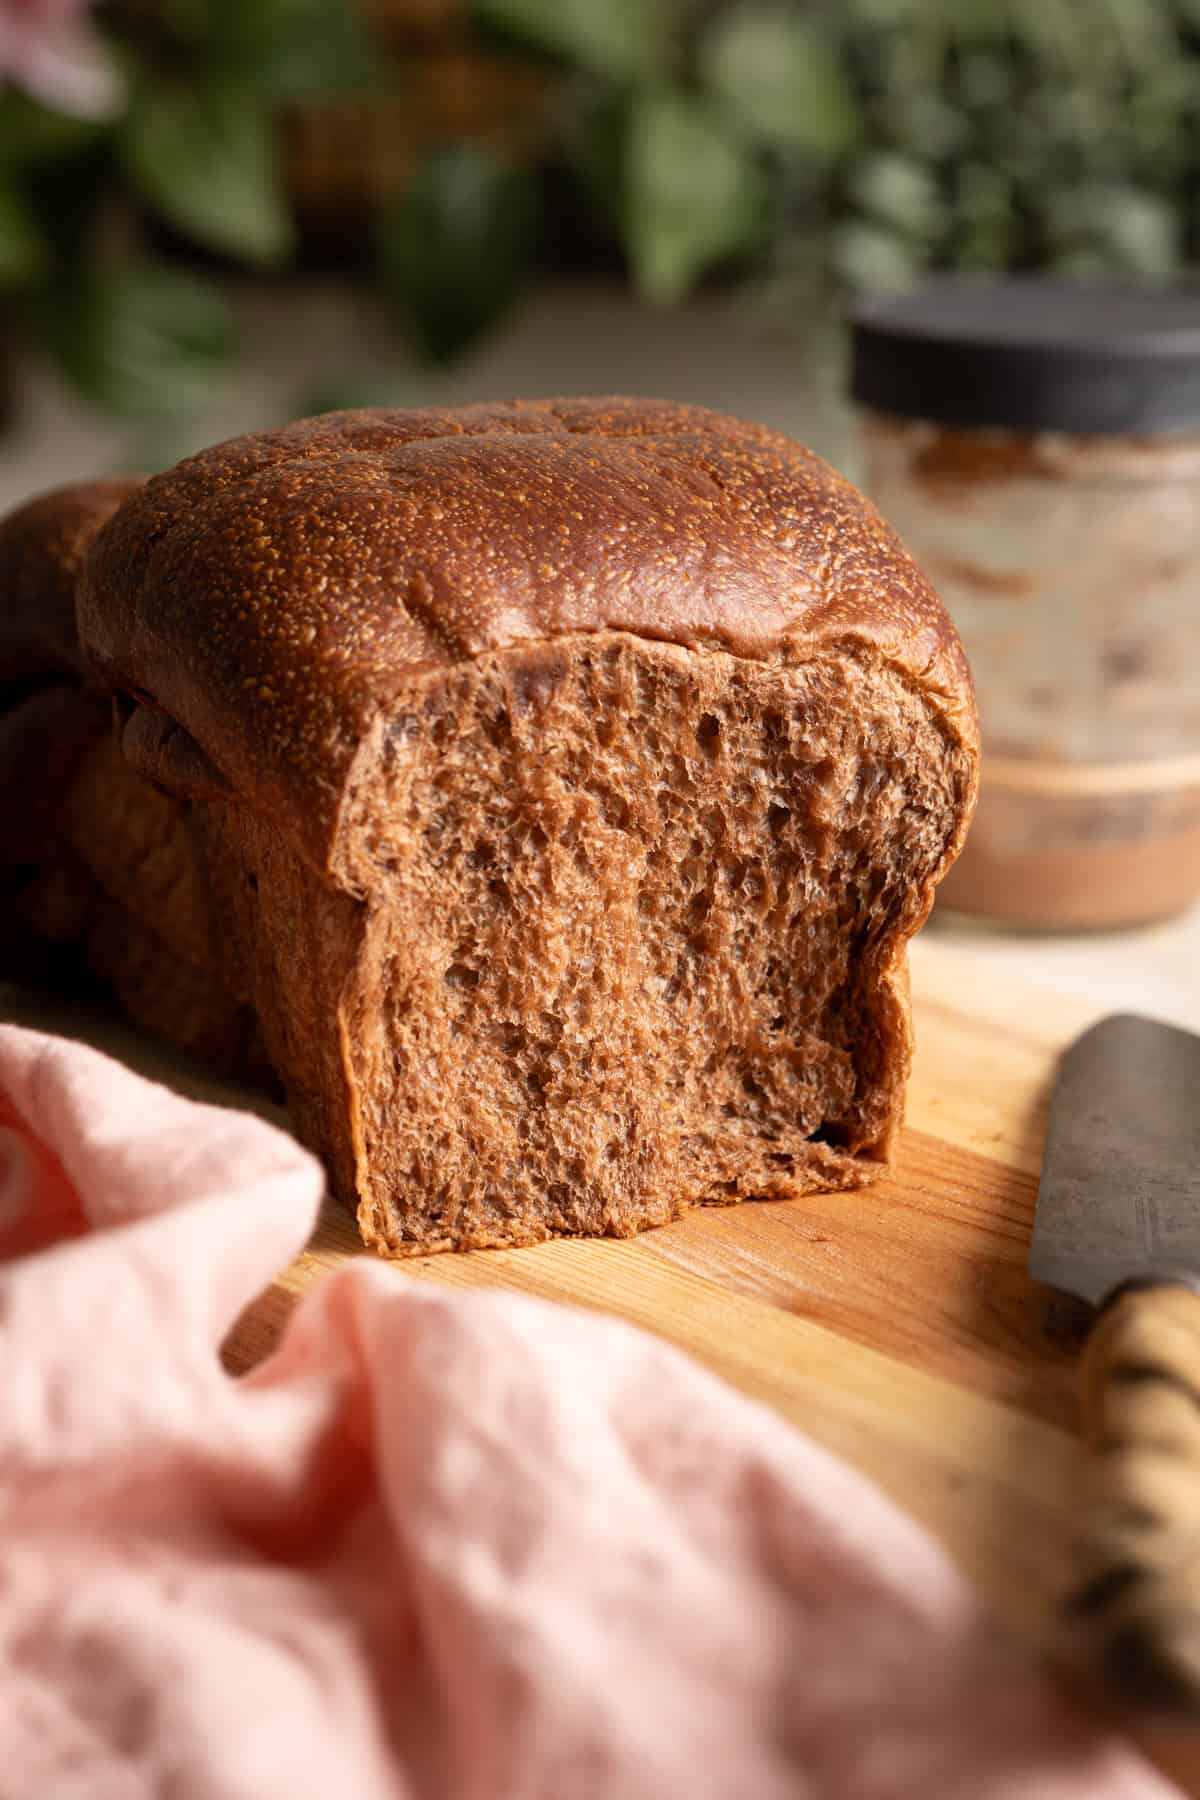
This loaf is just as delicious toasted with butter as it is fresh from the cooling rack (tho I highly recommend sneaking a slice as soon as it’s cool enough to cut).
If you’re looking for a fun way to use your sourdough starter without straying too far from the classic version, this chocolate sourdough milk bread is the perfect place to start. It delivers all the softness of traditional Japanese milk bread with a fun chocolate twist that’s special without being over the top.
And if you’re in the mood for another unique twist, don’t miss my matcha sourdough milk bread too!
Key ingredients and notes
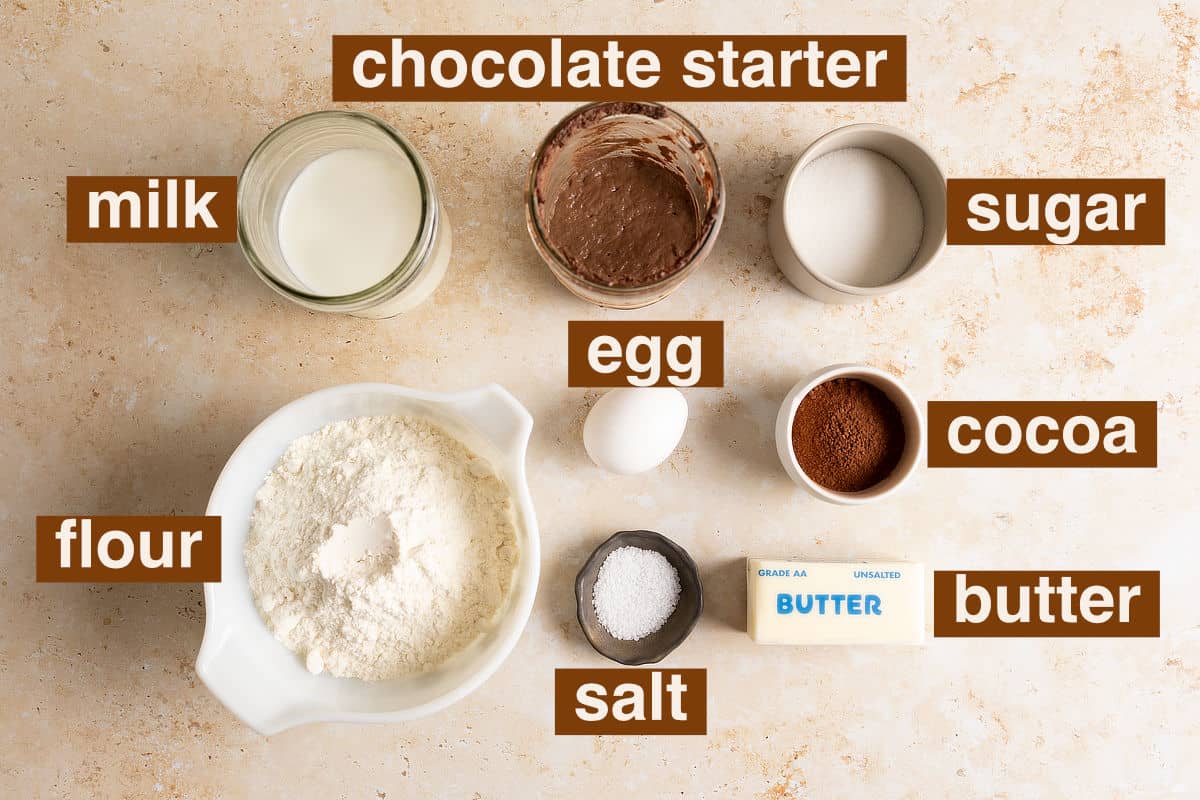
🍫 This chocolate milk bread gets its signature chocolate flavor from cocoa powder. I’ve been using Rodelle dutch processed cocoa powder for all of my baking for a few years now. I stock up at Costco 🤭. And I do prefer dutch processed over natural for its richer, darker flavor.
Other key ingredients…
I increase the amount of sugar in this recipe to 55 grams compared to 30 grams in my signature sourdough milk bread recipe. This makes the bread a little bit sweeter balancing out the slight bitterness of cocoa.
I use my chocolate starter in this recipe but you can make this bread with a regular sourdough starter if you don’t keep a chocolate version. If you do make it with a regular starter tho, I recommend adding an extra 5 grams of cocoa powder to the tangzhong when you cook it.
Sample baking schedule
This baking schedule was designed for a weekend bake that you can start Friday night after work in between dinner and bed time routines, and bake on Saturday afternoon. Or if you have a flexible work-from-home schedule, you can start the dough on a week night, and bake it the next day with minimal activities during the day so it doesn’t interfere with your work schedule and/or kids’ activity schedule.
| Day 1 | |
| 6:00 AM | Feed your sourdough starter |
| 6:00 PM | Scald milk + make tangzhong |
| 6:30 PM | Autolyse |
| 7:00 PM | Knead |
| 7:30 PM | Bulk fermentation start |
| 8:15 PM | Stretch and fold #1 |
| 9:00 PM | Stretch and fold #2 |
| 9:45 PM | Stretch and fold #3 + cold fermentation |
| Day 2 | |
| 8:00 AM | Divide dough + shape into balls |
| 8:15 AM | Roll into logs |
| 8:30 AM | Proof |
| 3:00 PM | Bake |
Let’s make chocolate milk bread!
If you find process photos helpful, follow along visually as we walk through this recipe step-by-step, take note of the suggested time stamp for each step. Otherwise, you can skip ahead, detailed instructions are in the recipe card below.
Day 1
My chocolate starter typically peaks within 12 hours, so I will make sure to feed it in the morning (around 6-7 am ish) if I know I’m going to start a batch of dough at night (around 6 pm ish). So make sure you build this into your schedule to ensure your starter peaks at the right time.
If you don’t have a chocolate starter, just make one while you’re feeding your regular starter. It’s pretty much the exact same process, except you add cocoa powder and sugar to it. Then it would be ready for you to use when it’s time to make the dough.
1. Scald the milk (6 pm)
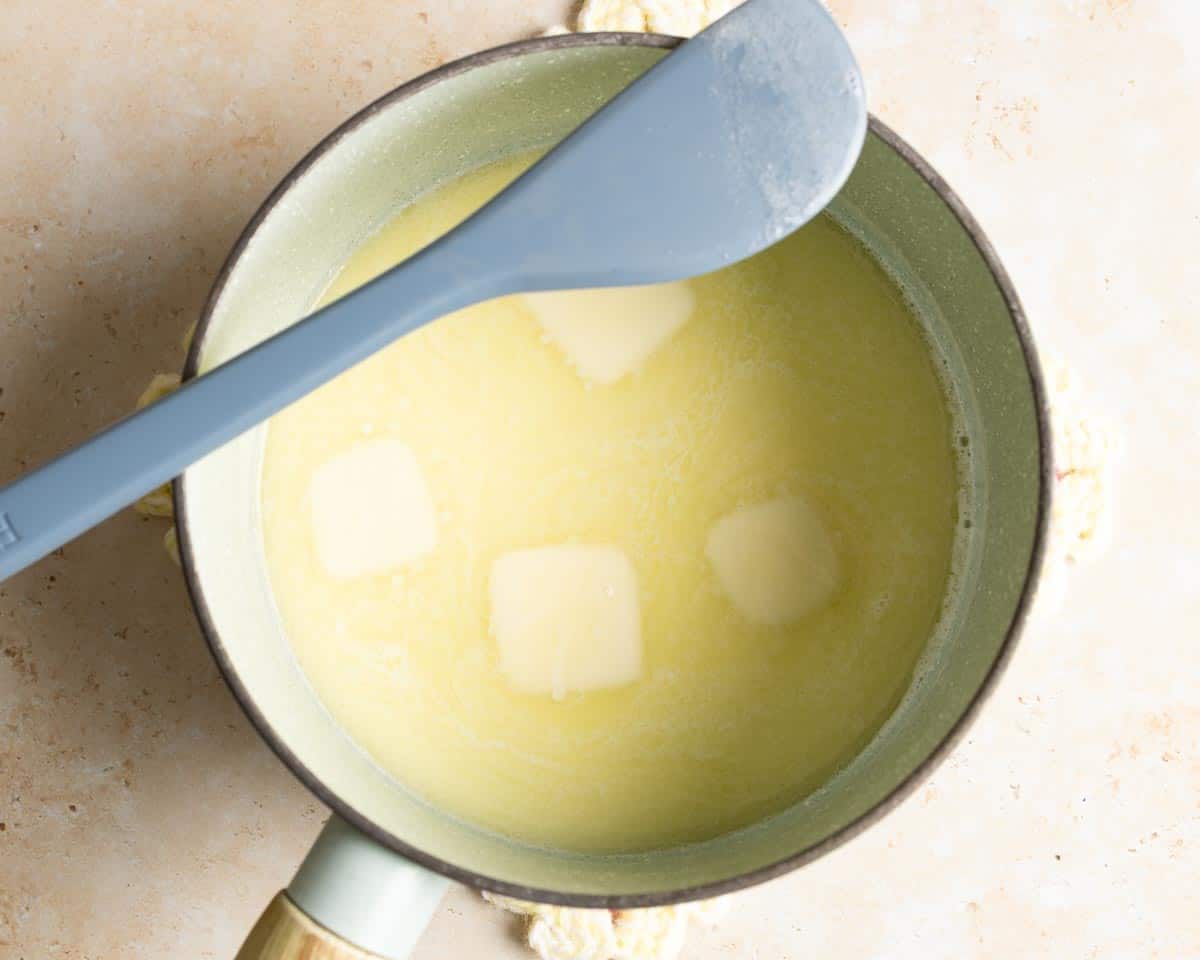
You’ll want to heat the milk in a small saucepan over med heat until just simmering at the edge, stir as you go until the sugar dissolves. You can take it off the heat, then add the butter to the hot milk to let it melt while cooling the mixture down. If the butter doesn’t melt completely, no big deal, you can put it back on the heat for just a bit. Immediately, transfer the mixture to your stand mixer bowl to cool – this will take about 20-30 minutes or so.
NOTE: I incorporate the butter with the milk in liquid form at the start instead of during kneading because I’ve tested both ways and didn’t see significant differences.
2. Make the chocolate tangzhong
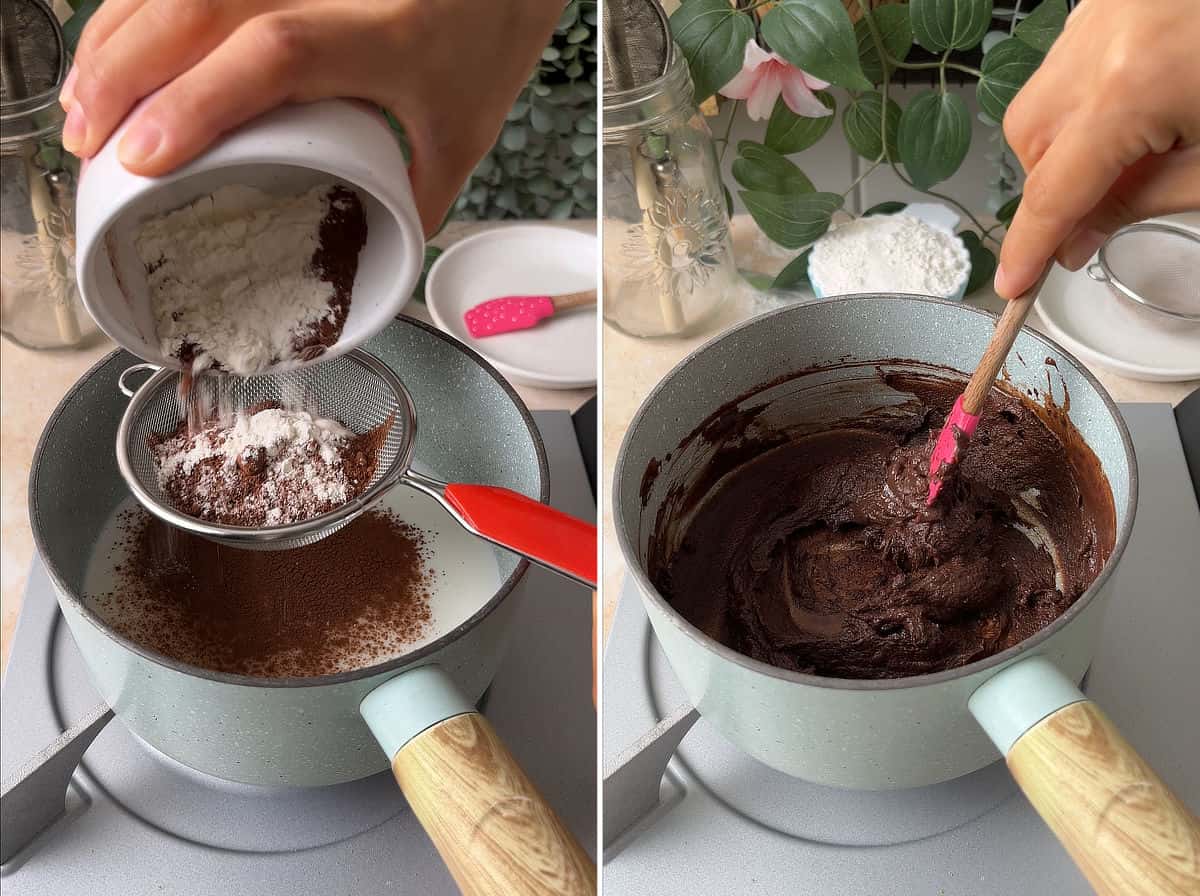
You can cook the tangzhong in the same saucepan without washing. Be sure to sift the flour with the cocoa powder over the milk before cooking to minimize clumps. Once done, you can transfer it to a plate and spread into a thin layer to cool.
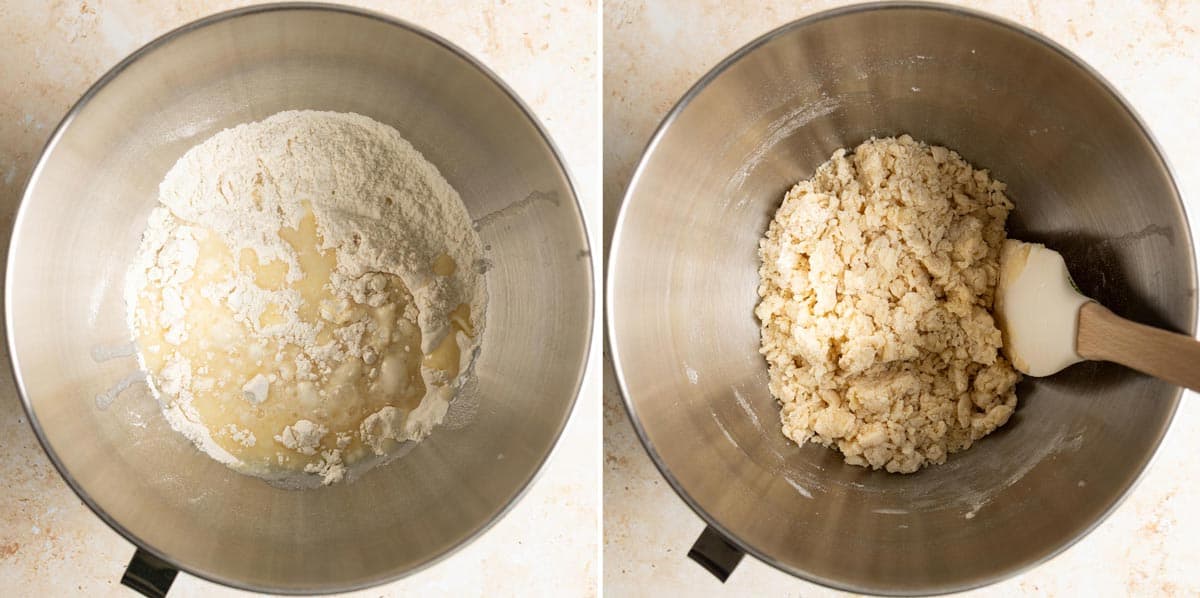
3. “Autolyse” (6:30 pm)
Mix together flour, salt and the cooled milk/butter mixture, cover and let this rest for 15-20 minutes.
NOTE: This is not a true autolyse since we are adding melted butter as well as salt to the mixture. However, I do find that this step, while short and non-traditional, helps with dough strength and extensibility in the stretch-and-fold steps. Without this “autolyse” step, the dough can break easily during stretch-and-fold.
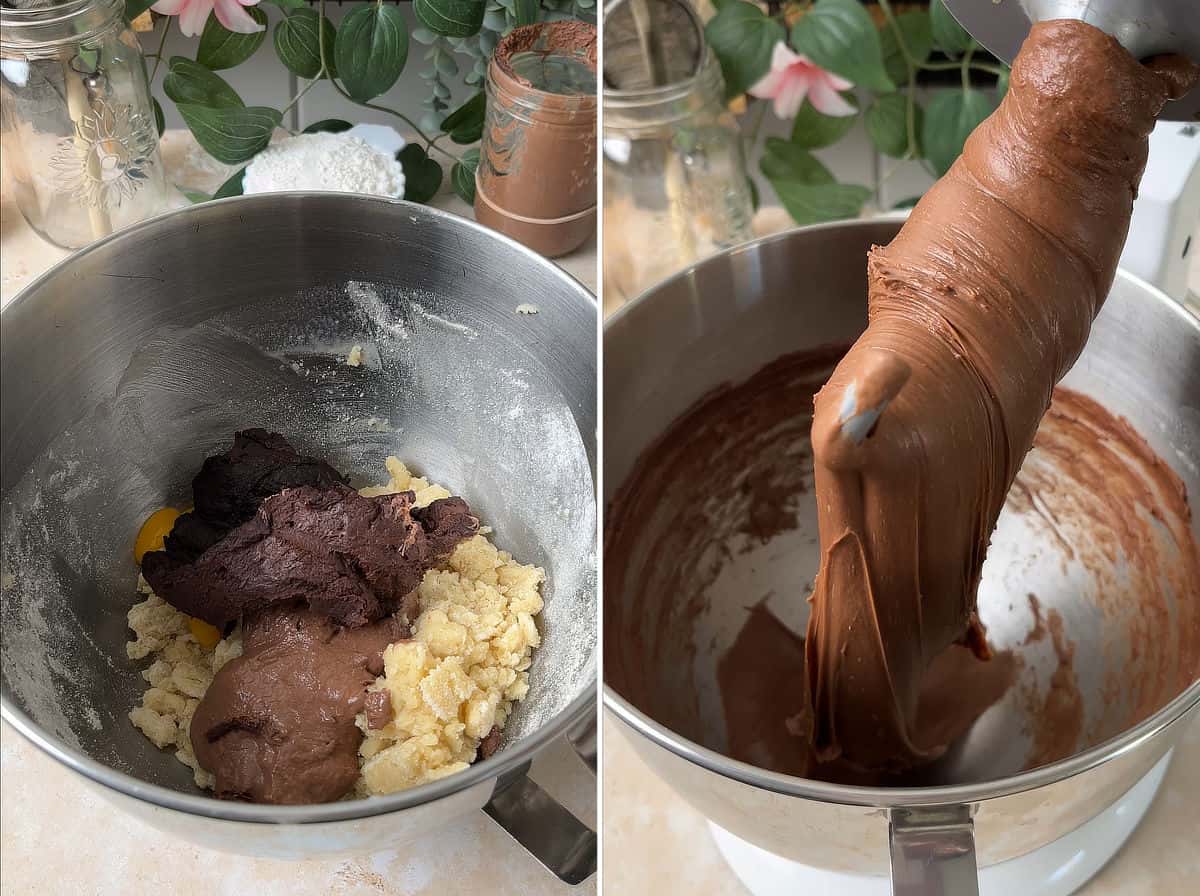
4. Knead the dough (~7 pm)
Add egg, chocolate tangzhong and chocolate starter and knead with the dough hook for 20 minutes.
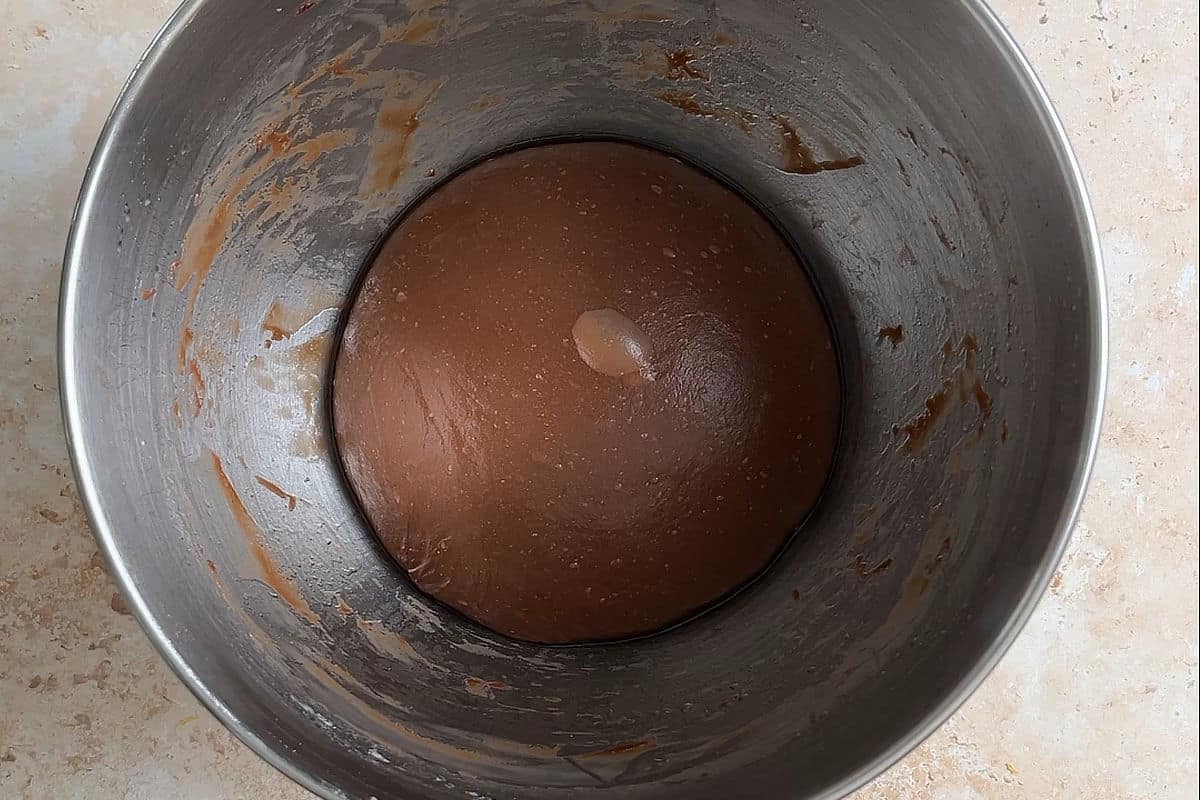
5. Start bulk fermentation (~7:30 pm)
Use a bit of oil on your hand and your bowl scraper to prevent sticking and scrape the dough out of your mixing bowl. Form a smooth ball, oil your mixing bowl before putting the dough back into it. You can use the same mixing bowl or a new bowl for bulk fermentation, either way is fine.
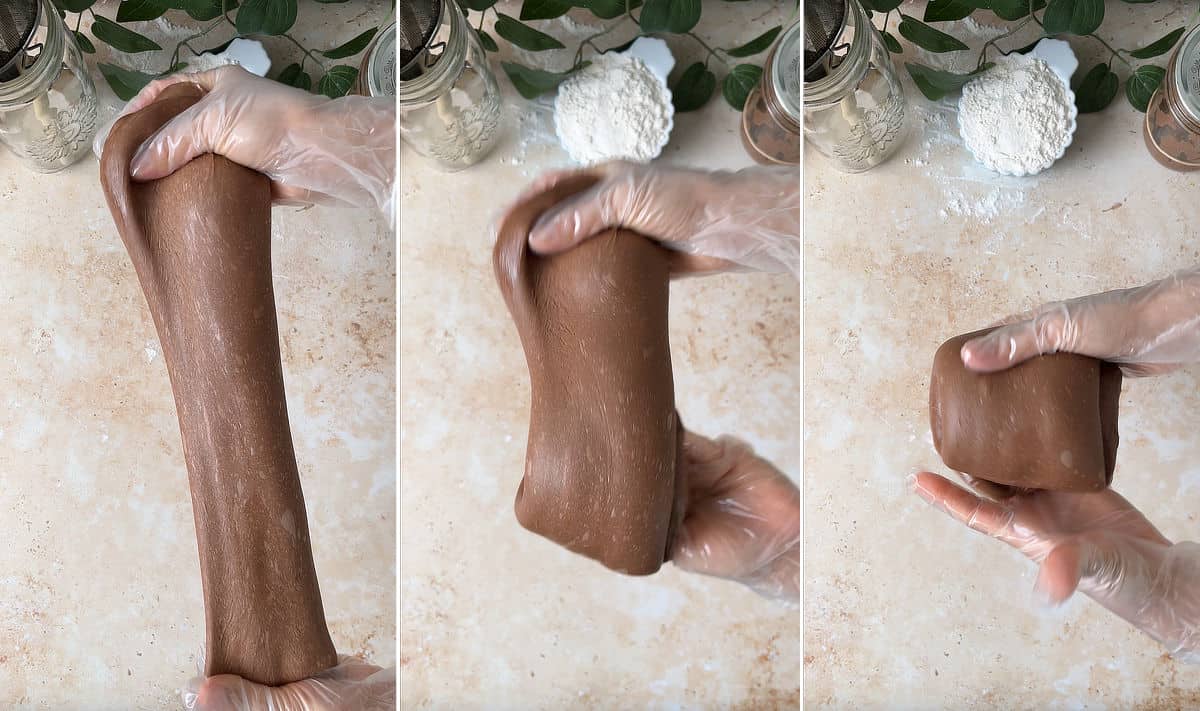
6. Stretches and folds (8:15, 9, 9:45 pm)
During bulk fermentation, you will perform 2-3 sets of stretch-and-fold to add strength to your dough at 45-minute intervals. Once you are finish with your last set, cover and refrigerate overnight.
NOTE: If you dough passes the windowpane test after kneading. You can totally skip this step. But I still find it beneficial and can see the dough rising higher instead of expanding horizontally. If your dough is really strong, it may not stretch very much during the last set, don’t force it.
Day 2
I usually take the dough out of the fridge as soon as I wake up on Day 2 to let it come to room temperature. It likely hasn’t doubled in size yet but should have grown overnight.
The time line is flexible here, depending on what I have going on in the morning. I would typically let it sit on the counter for about 2 hours to finish rising while I do my morning chores, take care of the dogs’ needs, make breakfast for kids, etc. Then I would start dividing and shaping.
But if you’re short on time in the morning, just divide and shape it right away while the dough is cold. Your proofing period may just be a little longer. I have been shaping cold dough while testing recipes quit a bit lately and didn’t notice any differences or even longer proofing time, but I’m also writing this during a very hot month.
The sample schedule above skips this 2 hours time period but again, the time stamps on these steps are suggestions, you can move them around to fit your schedule.
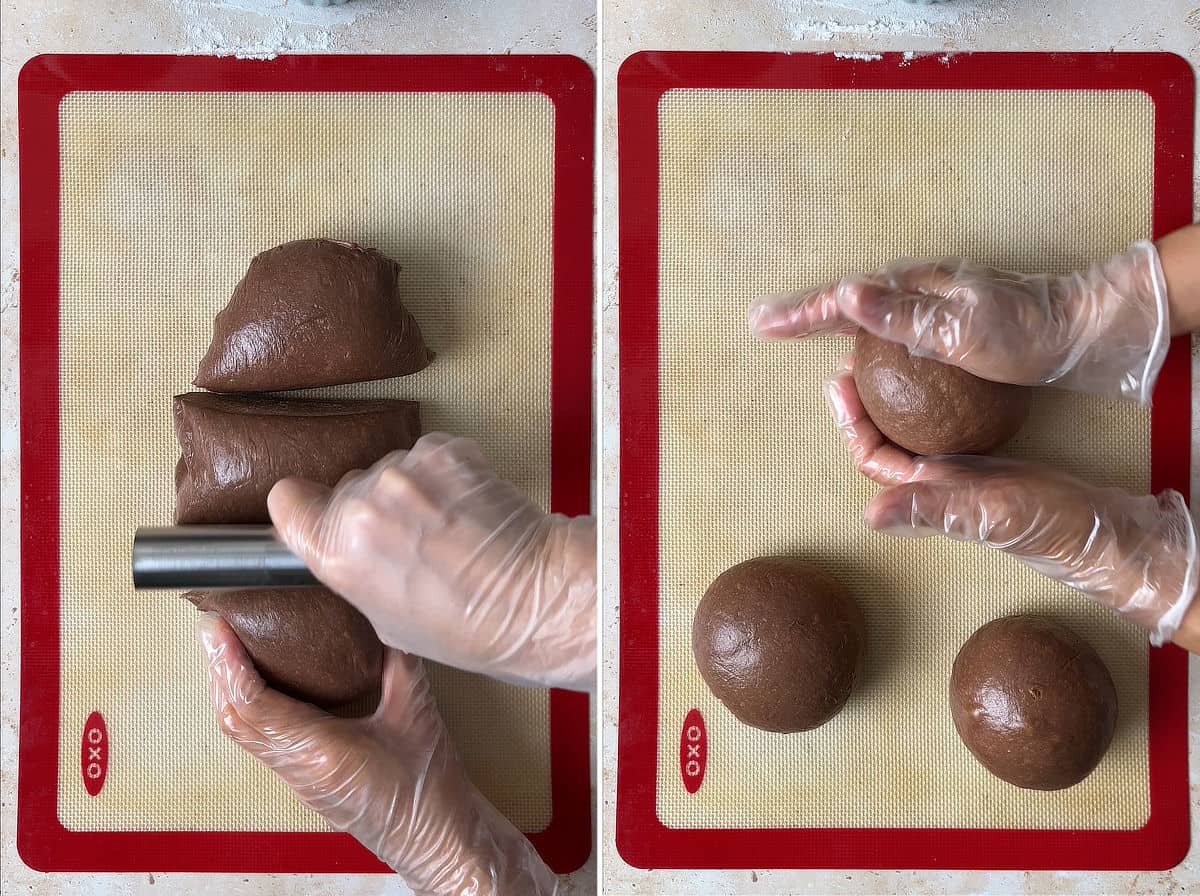
1. Divide the dough (8 am)
Cut the dough into 3 equal portions. Roll them into smooth balls, cover and let rest for 10-15 minutes to allow the gluten to relax before shaping.
NOTE: The dough shouldn’t be very sticky anymore. You can use just a bit of oil to keep it from sticking to your surface and hand. I love using a silicone baking mat for this part and also I’ve recently started using vinyl gloves – they’re super nonstick!
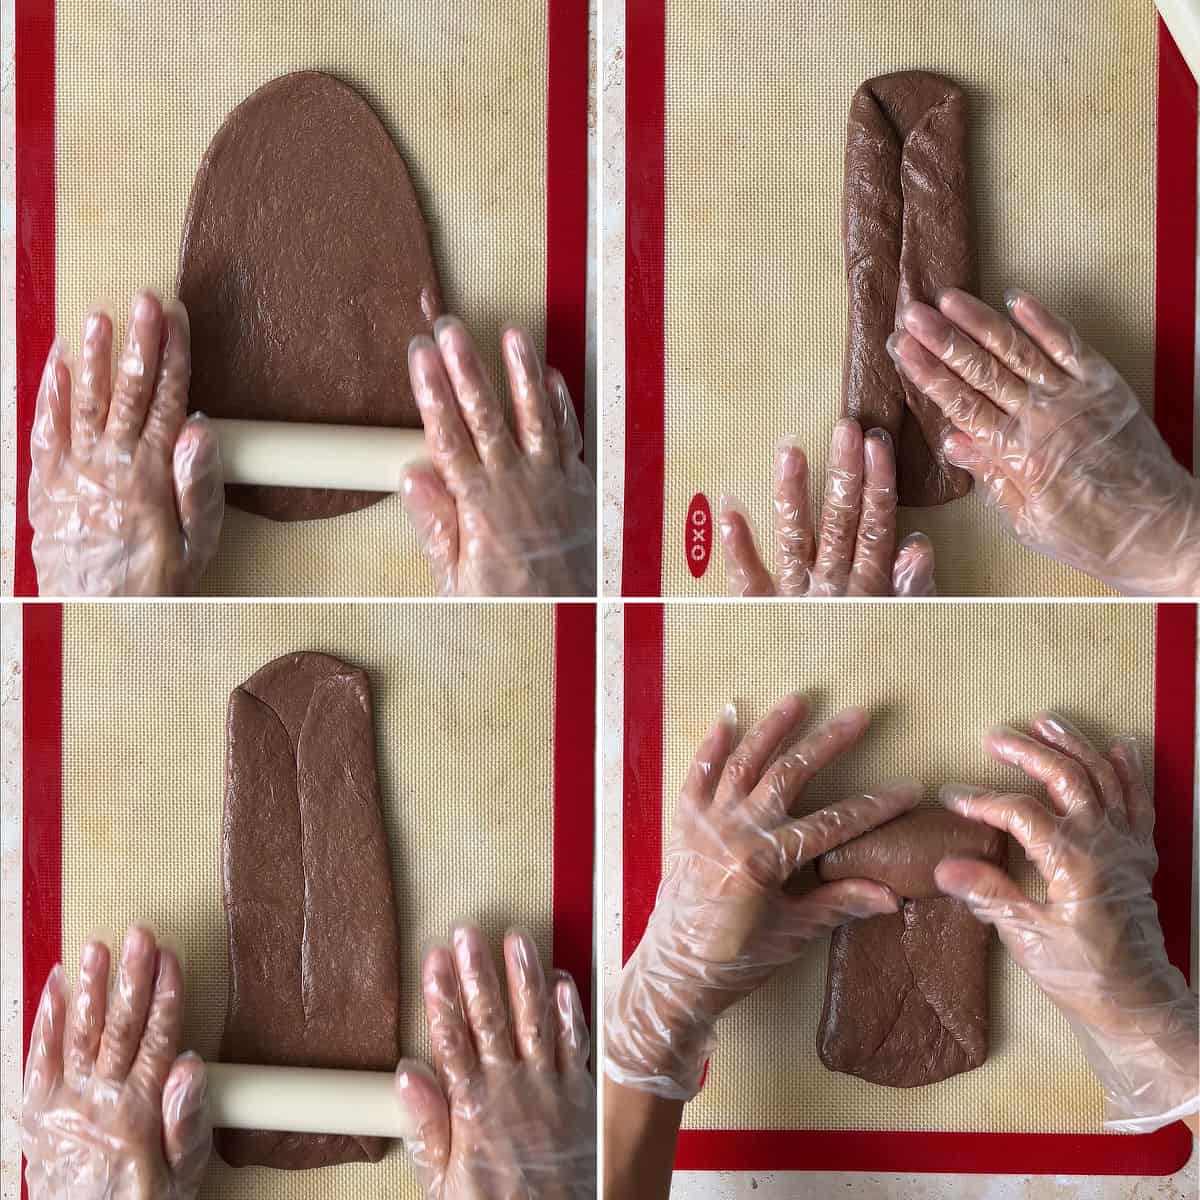
2. Shape into logs (8:15 am)
Shape each ball into a log like so and place them into your loaf pan.
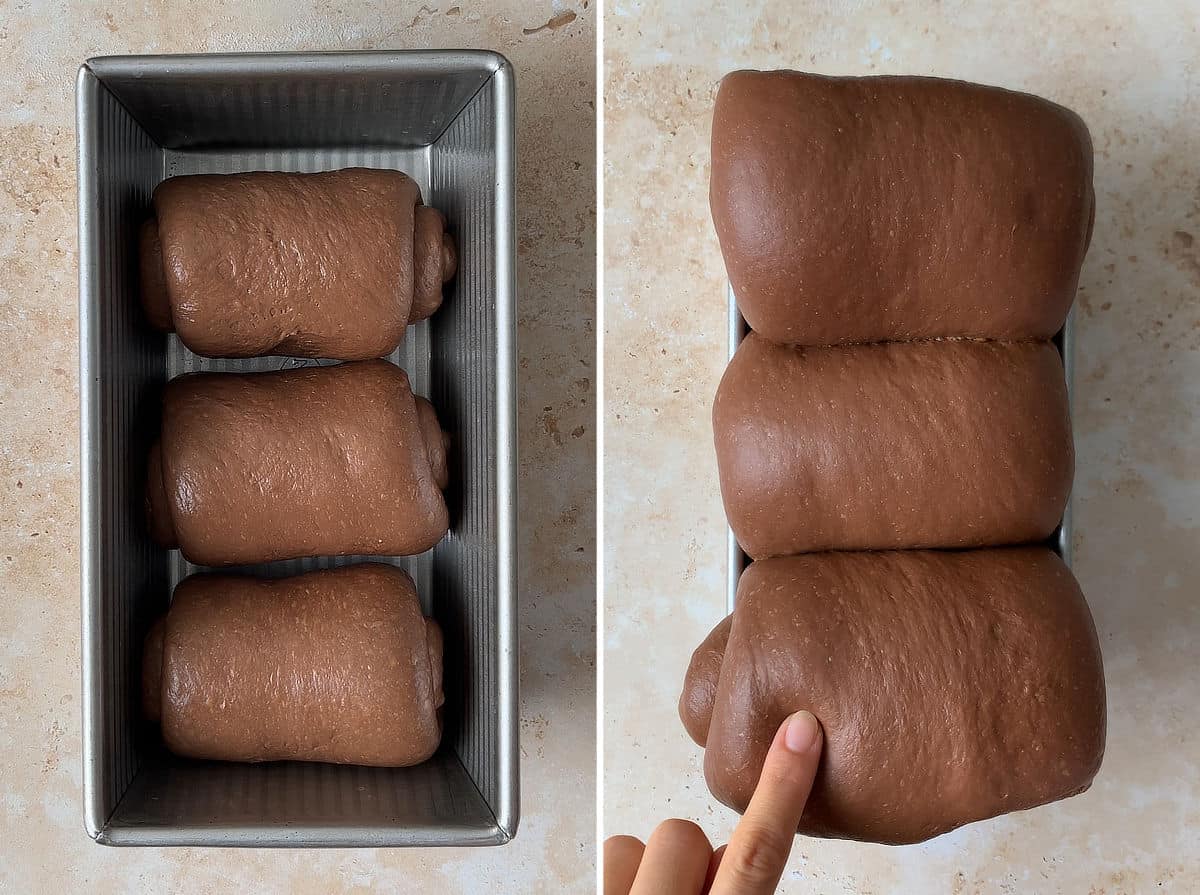
3. Proof the dough (8:30 am)
Proof the dough for 6 – 7 hours. The dough is ready when it is very puffy, has risen well above the rim of the loaf pan, and a gentle press leaves an indentation that slowly springs back (but not immediately).
NOTE: You can proof your dough inside your oven with the light turn on and a pan of hot water at the bottom of the oven to keep it warm and humid. Or place your loaf pan inside a 15-quart storage bin with a small tin of water as a make-shift proofing box. Proofing time is highly dependent on temperature so make sure to pay attention to visual cues.
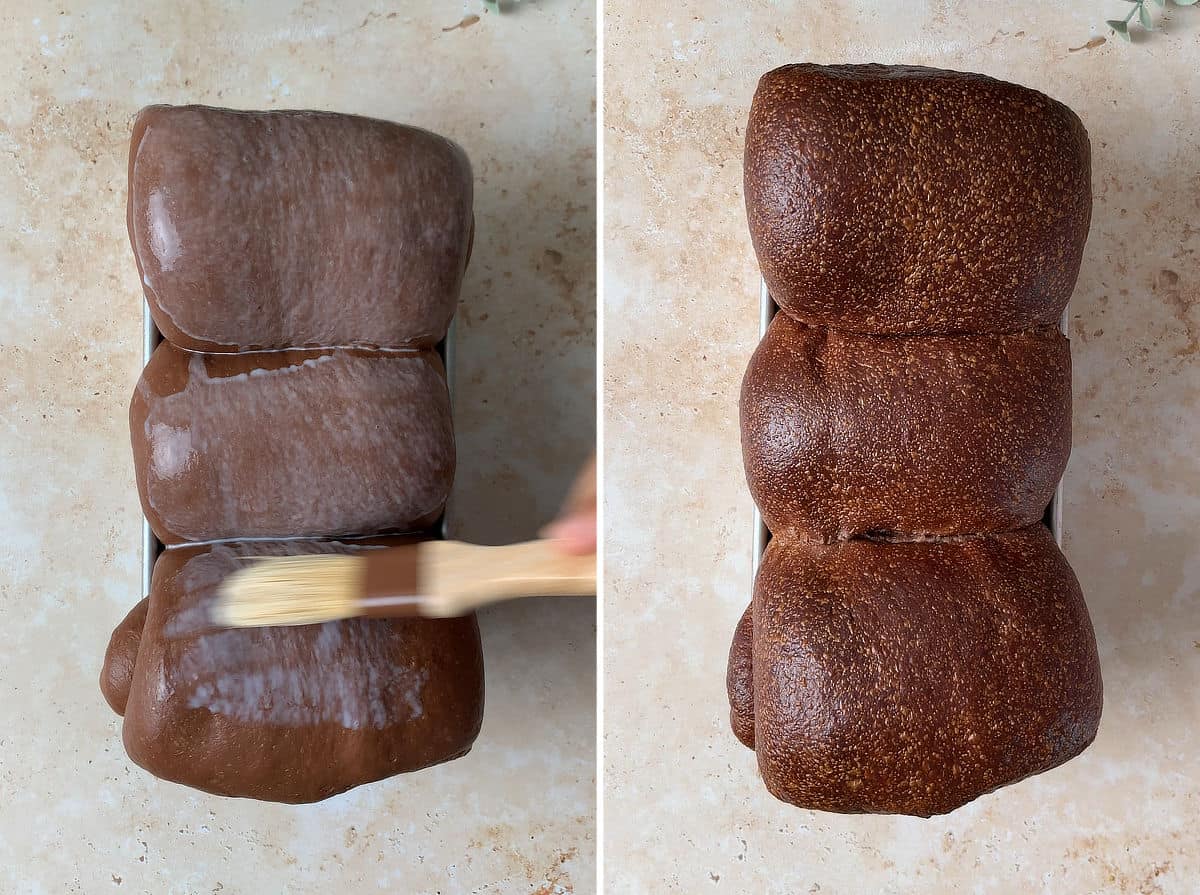
4. Bake (~3 pm)
Brush milk or egg wash (if you want shinier crust) generously over the surface of your dough and bake at 400°F (205°C) for 7 minutes, then reduce the temperature to 350°F (180°C) and bake for another 20 minutes. Total bake time is about 27 minutes. The internal temperature of your bread should reach 190 – 200°F. Let cool completely before cutting into it.
NOTE: The initial bake at 400°F will give you bread some oven spring helping it rise taller during the first few minutes. Then you want to bake it at a lower temperature to completely cook the inside. Don’t forget to lower the temp or your bread will be dry! (ask me how I know… 🥴)
Storage
- Room temperature: you can store your sourdough chocolate milk bread at room temperature for a couple days. Only slice off whatever you’re planning to eat to keep the moisture within the loaf. Store the bread in a ziploc bag. Since this loaf is homemade with no preservatives, I would keep it refrigerated to prevent spoiling if it lasts longer than 2-3 days.
- Refrigerator: you can also keep your bread in the fridge for a couple weeks. Again, only slice what you need and keep it in a ziploc bag. It does dry out a bit the longer you store it, but will get softer in the toaster with cripsy exterior.
- Freezer: for the freezer, I recommend slicing and then freezing. This way you can defrost only what you need when you need. Or freeze and thaw the whole loaf. Your bread should last up to 3 months. To preserve the flavor, wrap the loaf in foil as well as plastic and then store in a freezer bag.
Chocolate Sourdough Milk Bread Recipe
Equipment
- Kitchen scale
- Thermometer
- Stand Mixer
- Saucepan
- Spatulas
- Bowl scraper
- 1-pound loaf pan (8.5” x 4.5”)
- Silicone mat
- Vinyl gloves
Ingredients
Tangzhong
- 20 grams all-purpose flour 11.7% protein
- 15 grams (2 ½ tablespoon) cocoa powder
- 100 grams whole milk
Bread dough
- 73 grams whole milk
- 55 grams granulated sugar
- 57 grams unsalted butter sliced into thin pats
- 245 grams all-purpose flour 11.7% protein
- 6 grams kosher salt
- 1 large egg about 50 grams, room temperature
- 100 grams chocolate starter
- Neutral oil for dough handling
- Extra milk for wash
Instructions
Day 1
- Feed your starter (6 – 7 am) – Discard and feed your starter about 10-12 hours before you are planning to mix the dough. It should be ready within that time, give or take. Your starter should more than double in size, with bubbles distributed evenly throughout.
- Scald the milk (6 pm) – Heat 73 grams of whole milk with 55 grams of sugar in a small saucepan over medium heat, stirring constantly, until the milk is simmering and the sugar has fully dissolved. Turn off the heat, add the sliced butter to the hot milk mixture, and stir until completely melted. Transfer to the stand mixer bowl and let cool.73 grams whole milk, 55 grams granulated sugar, 57 grams unsalted butter
- Make the tangzhong – Add 100 grams of whole milk to the same saucepan without washing, and sprinkle 20 grams of flour along with the cocoa powder over it. Place over medium heat and stir constantly to incorporate the flour into the milk. Press out any lumps with a spatula and continue cooking until the mixture thickens into a paste. Transfer the tangzhong to a plate and spread into a thin layer to cool.20 grams all-purpose flour, 100 grams whole milk, 15 grams cocoa powder
- “Autolyse” (6:30 pm) – Once the milk/butter mixture has cooled to between 80 – 90°F (27 – 32°C), whisk together flour and salt in a separate bowl. Add this to the milk mixture. Use a spatula to mix until all the liquid is absorbed. The mixture will look a bit dry and clumpy, that’s okay. Cover and let rest for 15 – 20 minutes.245 grams all-purpose flour, 6 grams kosher salt
- Knead the dough (7 pm) – Add the cooled tangzhong, egg and 100 grams of ripe starter to the “autolysed” dough. Knead with the dough hook on speed 2 for 20 minutes. The dough will still feel tacky but should mostly pull away from the sides of the bowl.1 large egg, 100 grams chocolate starter
- Bulk fermentation (7:30 pm) – Oil your hands, a bowl scraper, and your clean countertop. Scrape the dough out and shape it into a ball on the oiled surface. Lightly oil the mixing bowl, then return the dough to the bowl. Cover and place in a warm spot. You will perform 2 – 3 sets of stretch and fold at 45-minute intervals. Set a timer for 45 minutes.Neutral oil for dough handling
- Stretch and fold #1 (8:15 pm) – With oiled hands, lift the dough from the center. It will stretch as you lift it up and out of the bowl. If it’s too sticky, use your bowl scraper to help release it. Stretch the dough into a long strip and fold in thirds like you’re folding a letter. Turn it 90 degrees, stretch it out into a long strip again and fold in thirds. Place it seam-side down back into the mixing bowl, cover, and set the timer for another 45 minutes.
- Stretch and fold #2 (9 pm) – Repeat the same process. At minimum, complete 2 sets if short on time.
- Stretch and fold #3 + cold fermentation (9:45 pm) – Repeat one final set. The dough should feel stronger and more elastic. Cover and refrigerate overnight. If you have more time in this step, let the dough ferment at room temp for another 45 mins before refrigerating.
Day 2
- Divide (8 am) – Using your bowl scraper, scrape the dough onto a lightly floured surface and divide into 3 portions, approximately 230 grams each. Roll each into a smooth ball. Cover and let rest for about 10-15 minutes.
- Shape (8:15 am) – Take each dough ball, smooth side down, flatten with your hand or roll into a rectangle, fold into thirds like a letter. Flatten again and allow it to stretch lengthwise, but keep the width slightly narrower than your loaf pan. Roll up into a log and place into the loaf pan.
- Proof (8:30 am) – Proof your dough in a warm spot for 6 – 7 hours. I typically use a 15-quart storage bin as my proofing box. You can also proof your dough in the oven with the light turned on and place a pan of hot water at the bottom of the oven to add humidity. The dough is ready when it is very puffy, has risen well above the rim of the loaf pan, and a gentle press leaves an indentation that slowly springs back (but not immediately).
- Preheat the oven (2:30 pm) – Toward the end of proofing, preheat the oven to 400°F (205°C) for at least 30 minutes. If proofing in the oven, remove the dough before preheating.
- Bake (3 pm) – Brush the top of the loaf and any exposed sides with extra milk. Bake at 400°F (205°C) for 7 minutes, then reduce the temperature to 350°F (180°C) and bake for another 20 minutes. The top should be golden brown and the internal temperature should reach 190 – 200°F.Extra milk for wash
- Cool – Let your bread cool in the pan on a wire rack until just warm to the touch before removing it from the pan. Cool completely before slicing.
Notes
- I prefer using oil to prevent dough from sticking to my hand instead of extra flour to avoid adding too much flour to the dough risking a drier loaf.
- On day 2, after fermentation, you shouldn’t need any flour or oil to handle this dough. Though you don’t have to, I suggest using a silicone mat and vinyl gloves to keep the dough from sticking to your counter and hands.
- Rising time and proofing time are highly dependent on temperature. Use the time as a general gauge but you should pay attention to visual cues to ensure you don’t under or over proof your bread.
- The timeline is a suggestion, feel free to modify it to fit your schedule.
Nutrition
Nutrition information is automatically calculated, so should only be used as an approximation.






Wow, wow, wow!! The chocolate flavor in this bread is subtle but so delicious! Thank you for this recipe!
So glad you likes the subtle chocolate flavor. Thank you for trying it!
I love this bread!! Is there a way to speed up the 2 day process? Could I cut out the overnight refrigeration to make it a same day recipe?
Yes absolutely! Just make sure you feed your starter the night before so you can start the dough early in the morning as soon as you wakeup, after the last set of stretch and fold, let it finish bulk fermentation at room temp and cut out the cold fermentation step all together. You want to look for a light airy dough that about double in size at the end of bulk, then you can divide, shape, proof and bake the same day. Make sure you keep it in a warm spot.
Awesome, thank you!!
Wow!! I don’t know what I was expecting but, damn girl this is yummy!!!! I would not change a thing!!
Thank you so much, Elizabeth! Glad to hear you loved it 🙂
Super Excited to try this!
Thank you for the detailed instructions, especially how to vary it to fit into my schedule
I do have questions 🙂
What size bread pan are you using/recommend?
Do you initially cover during the initial higher temp portion to assist with oven spring?
Thanks again for posting this recipe!
You’re so welcome Shannon. I use this loaf pan (affiliate) for a good year now. I like them because they have a silicone coating on the inside and you don’t have to butter the pan before baking. You can also use it for banana breads and other stuff too. I don’t cover during baking at all unless I notice it’s getting too brown/burning. I hope you like the recipe, can’t wait to see your bread!
I don’t see where you put in the starter.
Step 5 under Day 1 in the recipe card: Knead the dough (7 pm) – Add the cooled tangzhong, egg and 100 grams of ripe starter to the “autolysed” dough.
Did you tell us how to make the chocolate starter/give your recipe for this specific Levain?
Hello! Did you tell us how to make the chocolate starter/give your recipe for this specific Levain? Don’t see it in the recipe or that you add 100 g starter in the actual list but saw it in directions.
Hi Amy, sorry for the confusion since I have a separate post for the chocolate starter here. The intention is that you could make it with a chocolate starter or make it with a regular starter. I should probably make it more clear in the recipe card.
Do you have any recommendations for egg substitute?
Hi Mila, you can try to replace it with 50 grams of milk.