I had 3 old apples hanging out on my kitchen counter for an embarrassingly long time. My husband told me to do something about them… so I turned them into apple butter, which naturally ended up in this apple butter sourdough milk bread 🤷🏻♀️
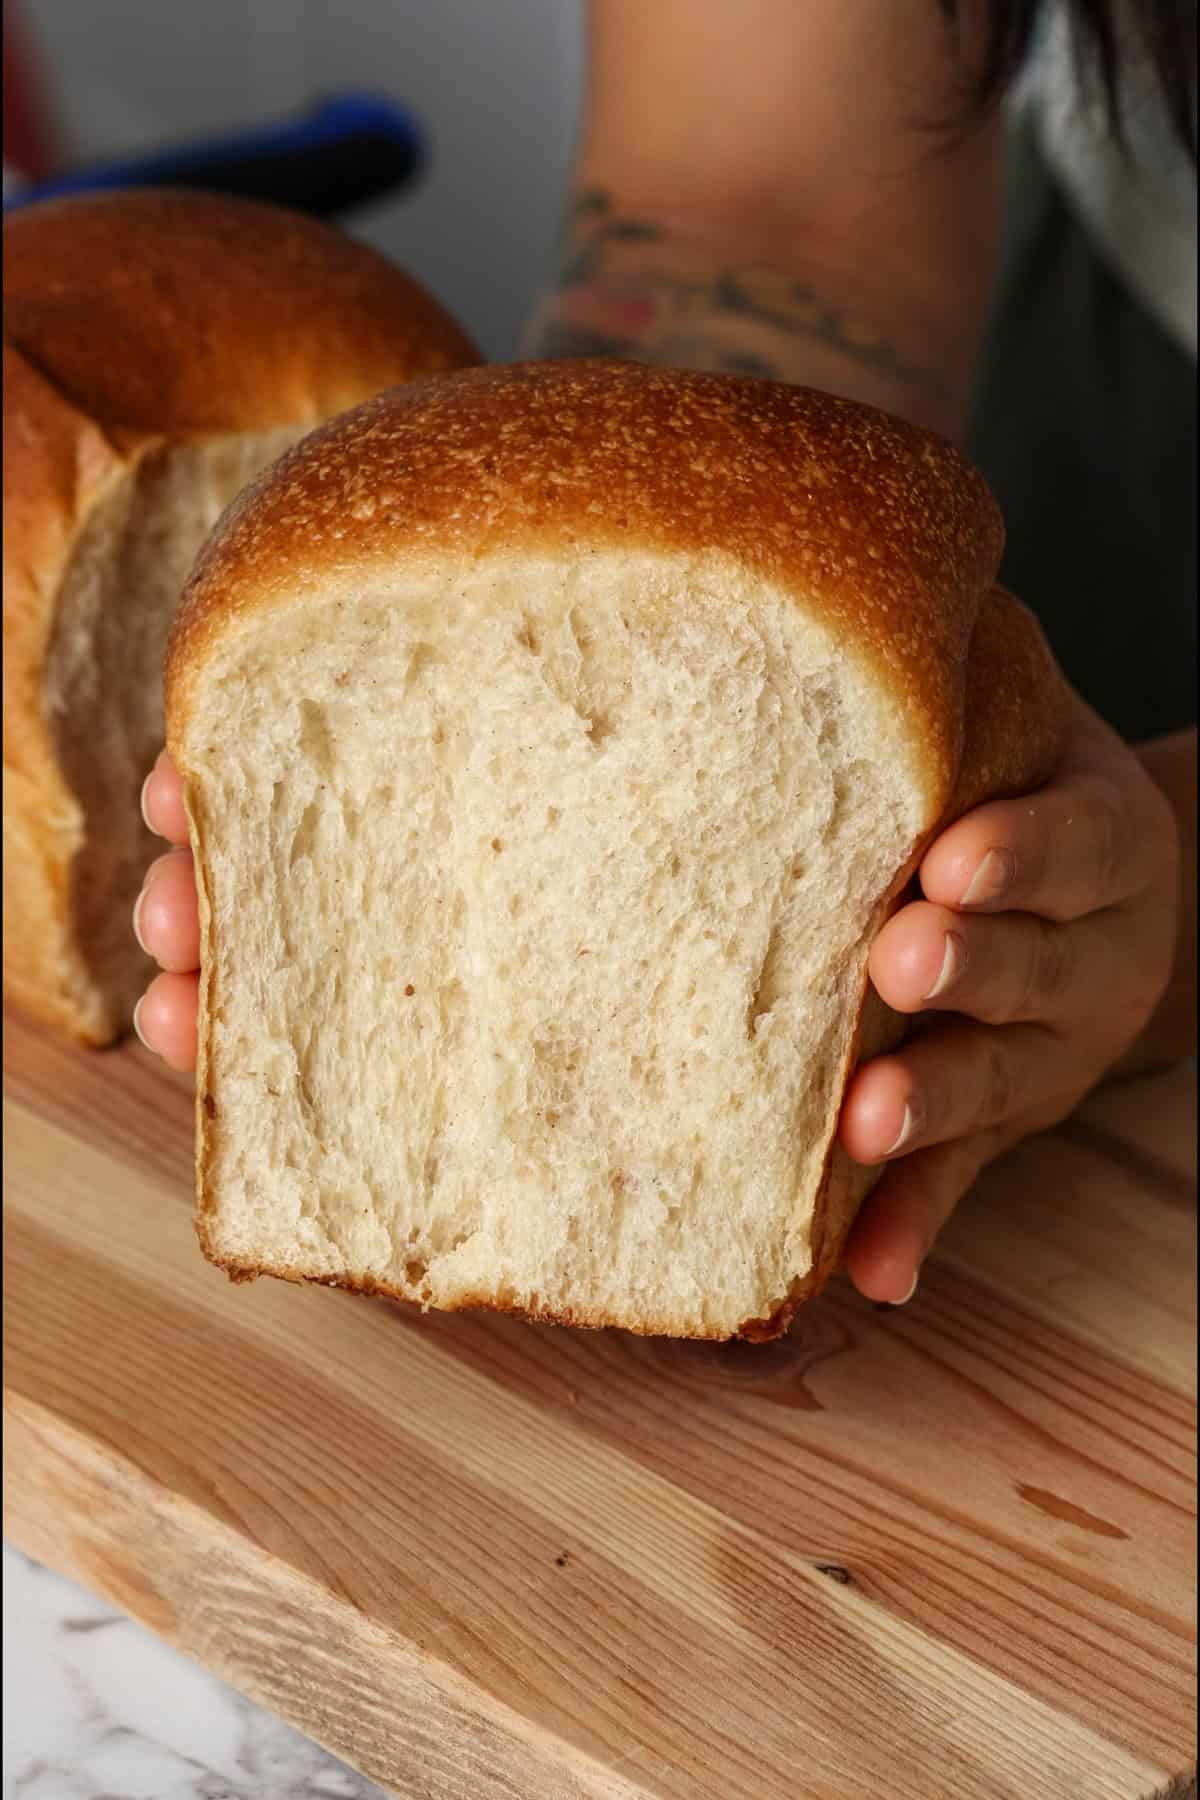
The result? Soft, fluffy bread with little specks of apple butter throughout. It’s slightly sweet with a hint of spice, making this a really good loaf to eat on its own or toasted with a little butter. I didn’t add any extra spices beyond what was already in the apple butter, so the flavor stays pretty mellow.
If you’re not into sourdough pumpkin milk bread, this might be more your kind of fall bread.
Key ingredients
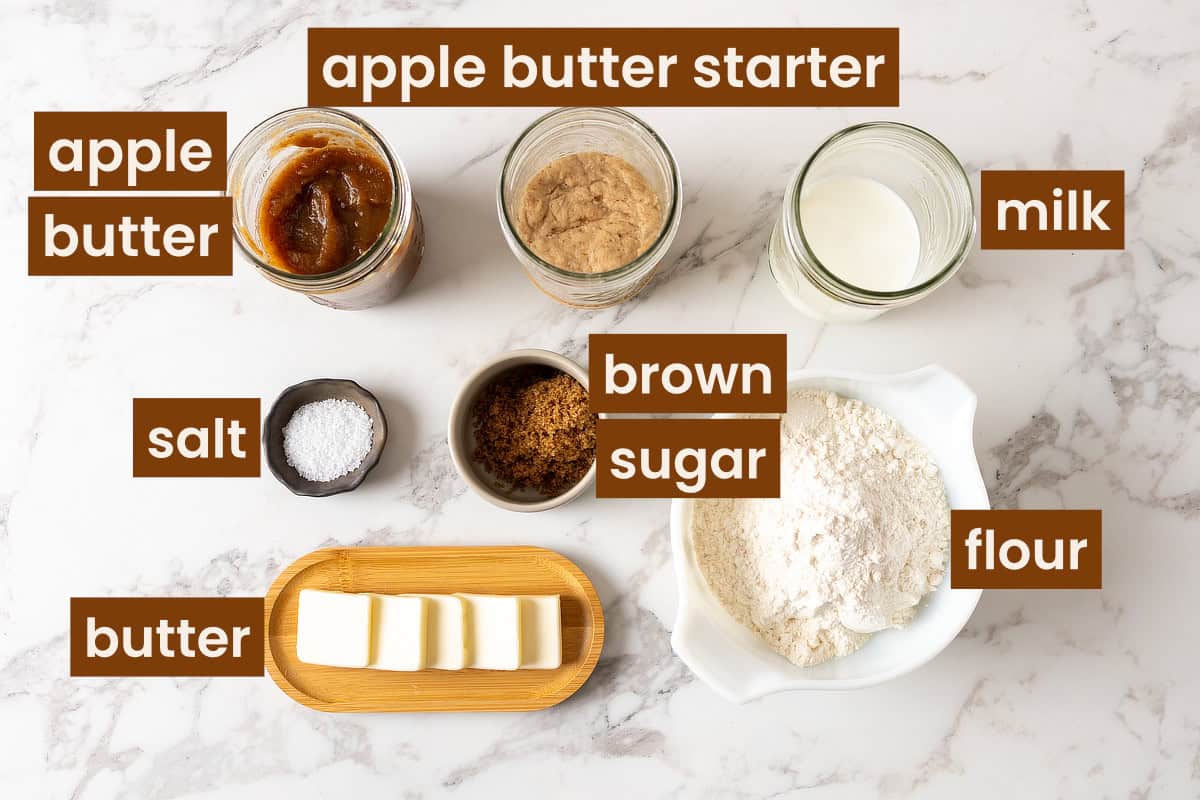
🍎 I have to say homemade apple butter is an absolute key in this recipe. I’ve not been able to replicate this recipe with store bought apple butter (the only brand I can find easily was Musselman’s at Albertsons). So far, the only difference I can point to is the spices. My homemade apple pie spice does not contain cloves and the Musselman’s apple butter has cloves in it.
So if you’re using store bought apple pie spice to make the apple butter, just check to make sure it doesn’t include cloves, some brands do and some don’t. If yours has cloves, I recommend just using cinnamon instead.
Sample baking schedule
There are a couple things you still need to prepare the day before: your apple butter and your starter. The schedule below accounts for that. You can also make the apple butter well ahead of time and refrigerate for several weeks. Remember that the timeline is my best estimate based on my kitchen tests. Your exact timeline will vary depending on your kitchen environment.
| Day 1 | |
| 7:00 AM | Feed your regular sourdough starter |
| Anytime | Make apple butter (~8 hrs in the slow cooker) |
| 7:00 PM | Make apple butter starter with active starter |
| Day 2 | |
| 8:00 AM | Scald milk & prepare liquid |
| 8:15 AM | Autolyse |
| 8:35 AM | Knead the dough |
| 9:00 AM | Continue bulk fermentation |
| 9:45 AM | Stretch and fold #1 |
| 10:30 AM | Stretch and fold #2 |
| 11:15 AM | Stretch and fold #3 + continue bulk |
| 2:00 PM | Finish bulk + divide dough (may be earlier if your dough rise faster) |
| 2:15 PM | Shape into logs |
| 2:30 PM | Proof |
| 10:00 PM | Bake (may be earlier if your dough proof faster) |
The schedule pushes the bake really late, if this doesn’t work for you, you can push it to Day 3. You can add a cold fermentation step after you finish bulk fermentation at 2pm or after you shape the dough at 2:15pm. I’ve done this both ways. Then you can take it out of the fridge right before bed, proof overnight, and bake in the morning. You’ll see this option in the time stamp in my recipe card.
The one disadvantage of proofing overnight is that you won’t be able to watch it and if your loaf ends up proofing much faster, you risk overproofing it. In this case you also have the option to leave it in the fridge overnight and proof in the morning of Day 3.
Let’s make apple butter sourdough milk bread!
Instructions for the apple butter are in my recipe card at the end of this post but I’m not going to walk through it here. If you want more details/process photos, you can check out my post on slow cooker apple butter on my other blog.
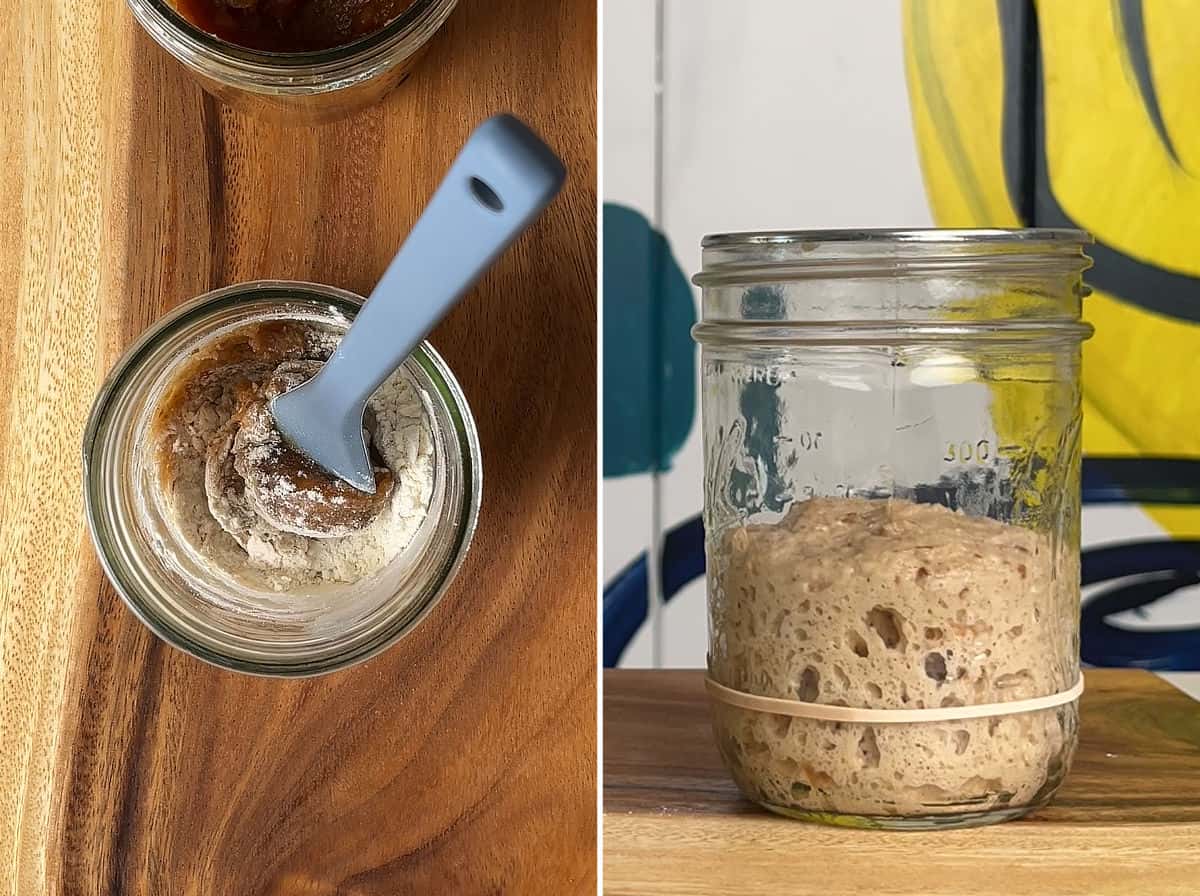
1. Make apple butter starter (night before)
If you’re cooking the apple butter the same day you’re making this starter, just make sure you’re not using piping hot apple butter straight from the slow cooker. Let it cool first. Otherwise, you can use room temp or even cold apple butter straight from the fridge.
NOTE: Make sure you have an active regular sourdough starter before making this apple butter starter.
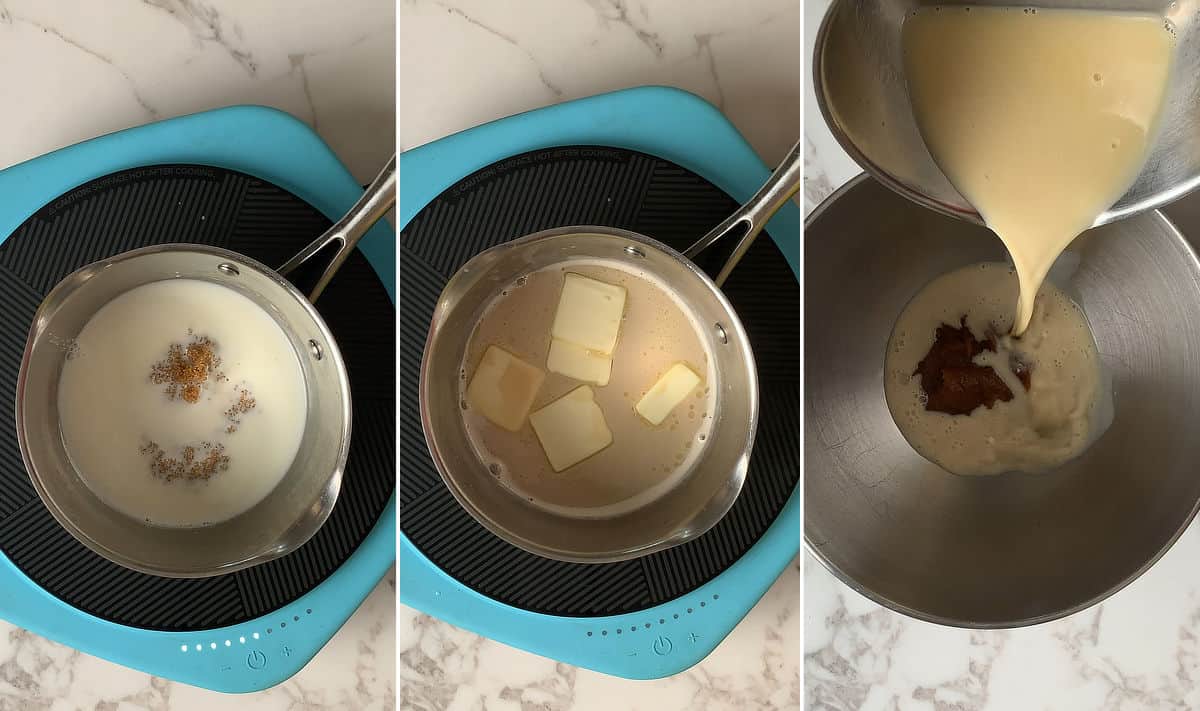
2. Prepare your liquid
It’s completely okay to use cold apple butter from the fridge in this step, it will cool your mixture down faster and you may be able to start the autolyse step right away.
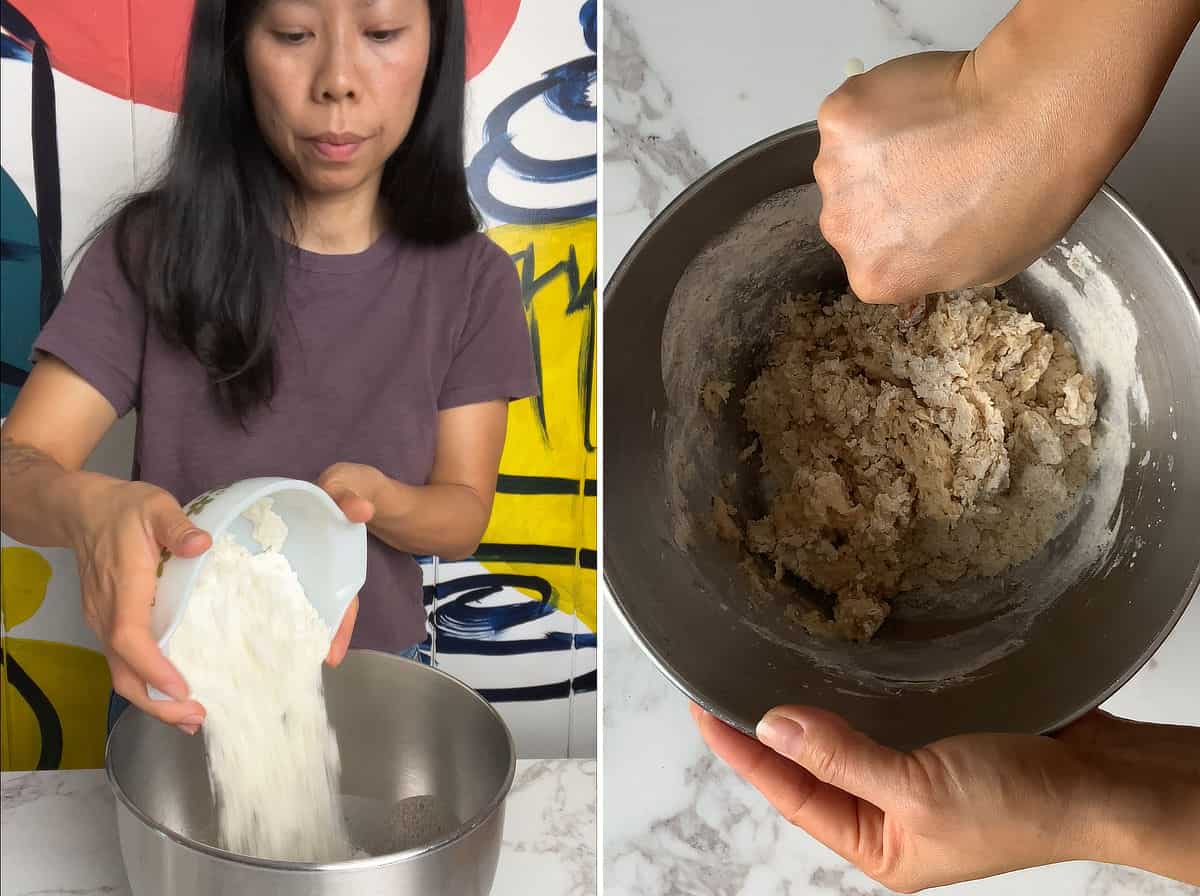
3. “Autolyse”
This is not a true autolyse since we are adding a bunch of non-traditional ingredients to the mixture. However, I think this step still helps with dough strength and extensibility. And I have never done otherwise.
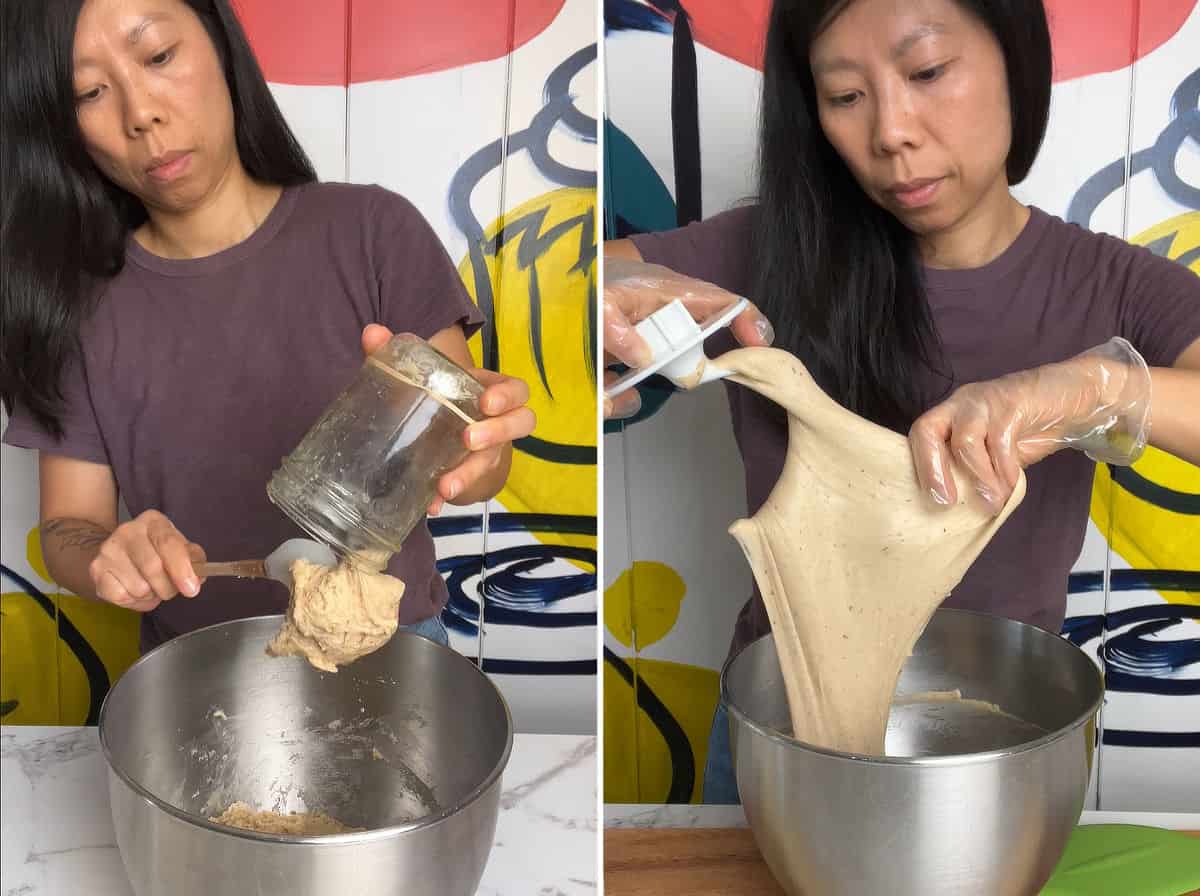
4. Knead the dough
Add all of the apple butter sourdough starter to the “autolysed” dough and knead with the dough hook for 20 minutes. The dough should pull away from the side of the bowl easily. You’ll want to shape it into a ball and place it back into the bowl to continue bulk fermentation.
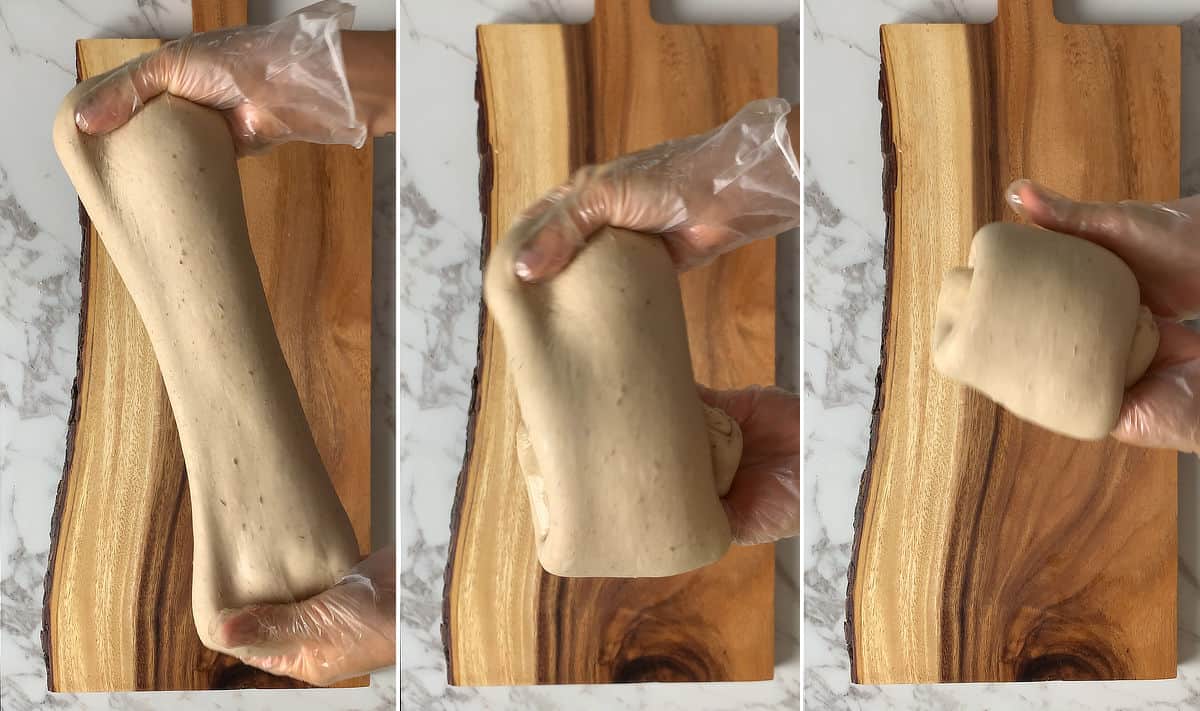
5. Stretches and folds
During bulk fermentation, you will perform 3 sets of stretch-and-fold to add strength to your dough at 45-minute intervals. Once you are finish with your last set, cover and let the dough finish bulk fermentation at room temp.
NOTE: You will notice the dough rising some during this step. That’s okay, don’t worry about deflating it. You will also notice it gets harder to pull and stretch during set 2 and 3. Don’t force it, you want to build strength but don’t want to break the gluten strands.
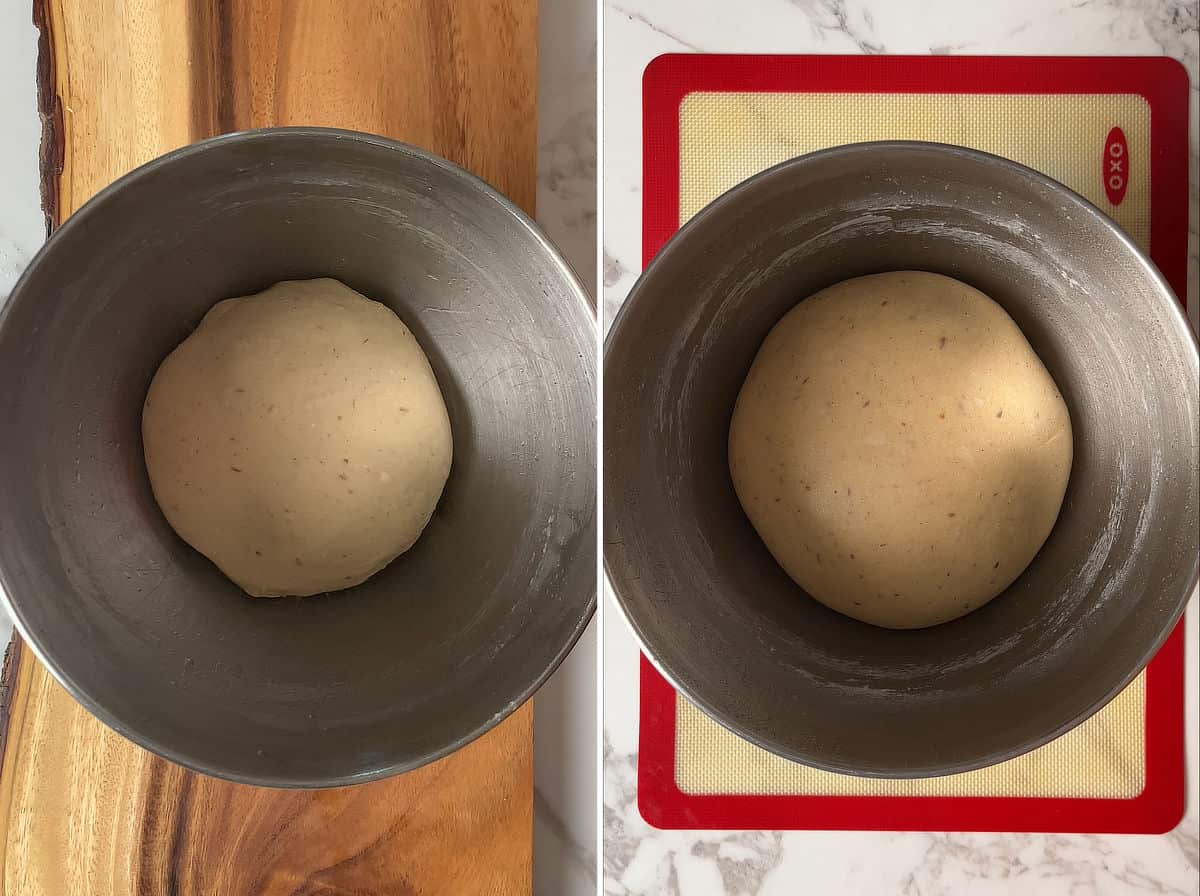
6. End bulk fermentation
You should visibly see how the dough changes during bulk fermentation. Here are photos of the start and end of bulk fermentation.
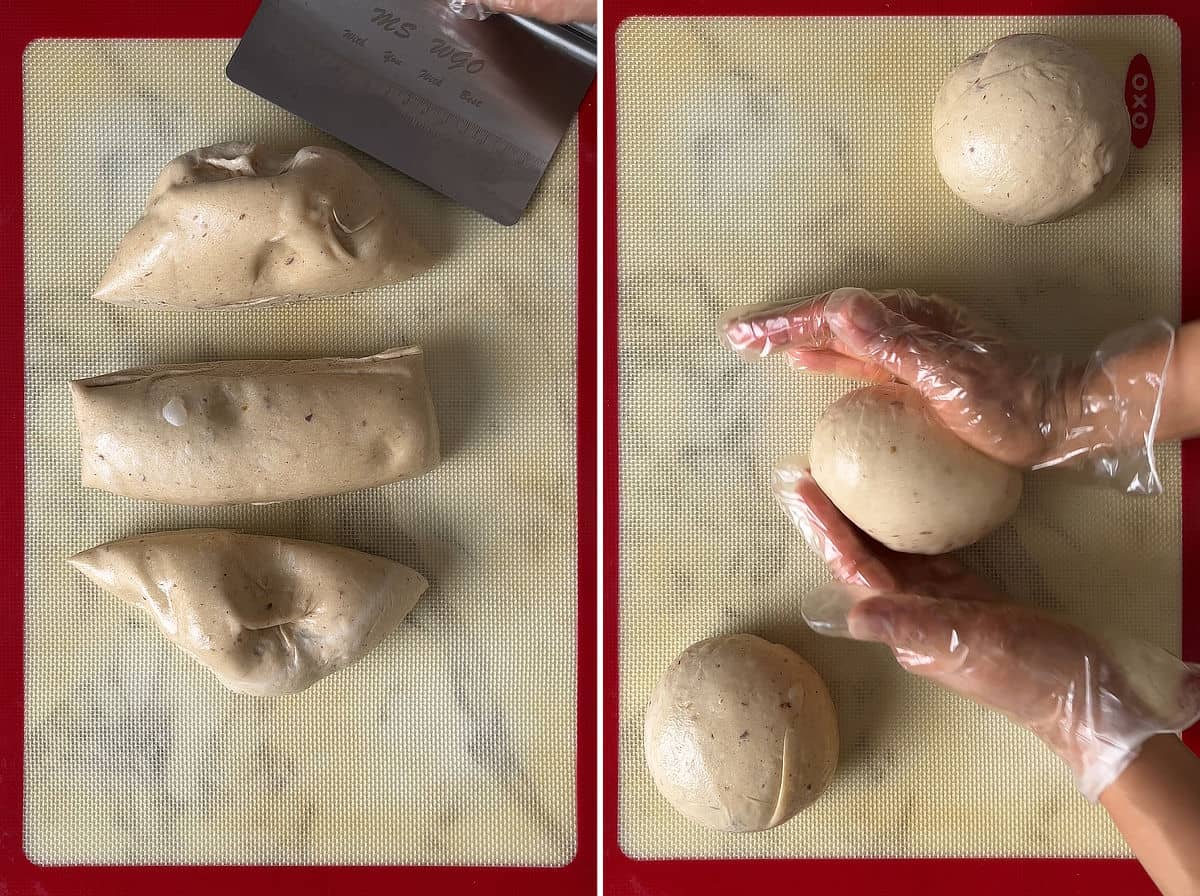
7. Divide the dough
Cut the dough into 3 equal portions. Roll them into smooth balls, cover and let rest for 10-15 minutes to allow the gluten to relax before shaping.
NOTE: The dough is not that sticky but I love using a silicone baking mat and vinyl gloves to keep everything clean and nonstick.
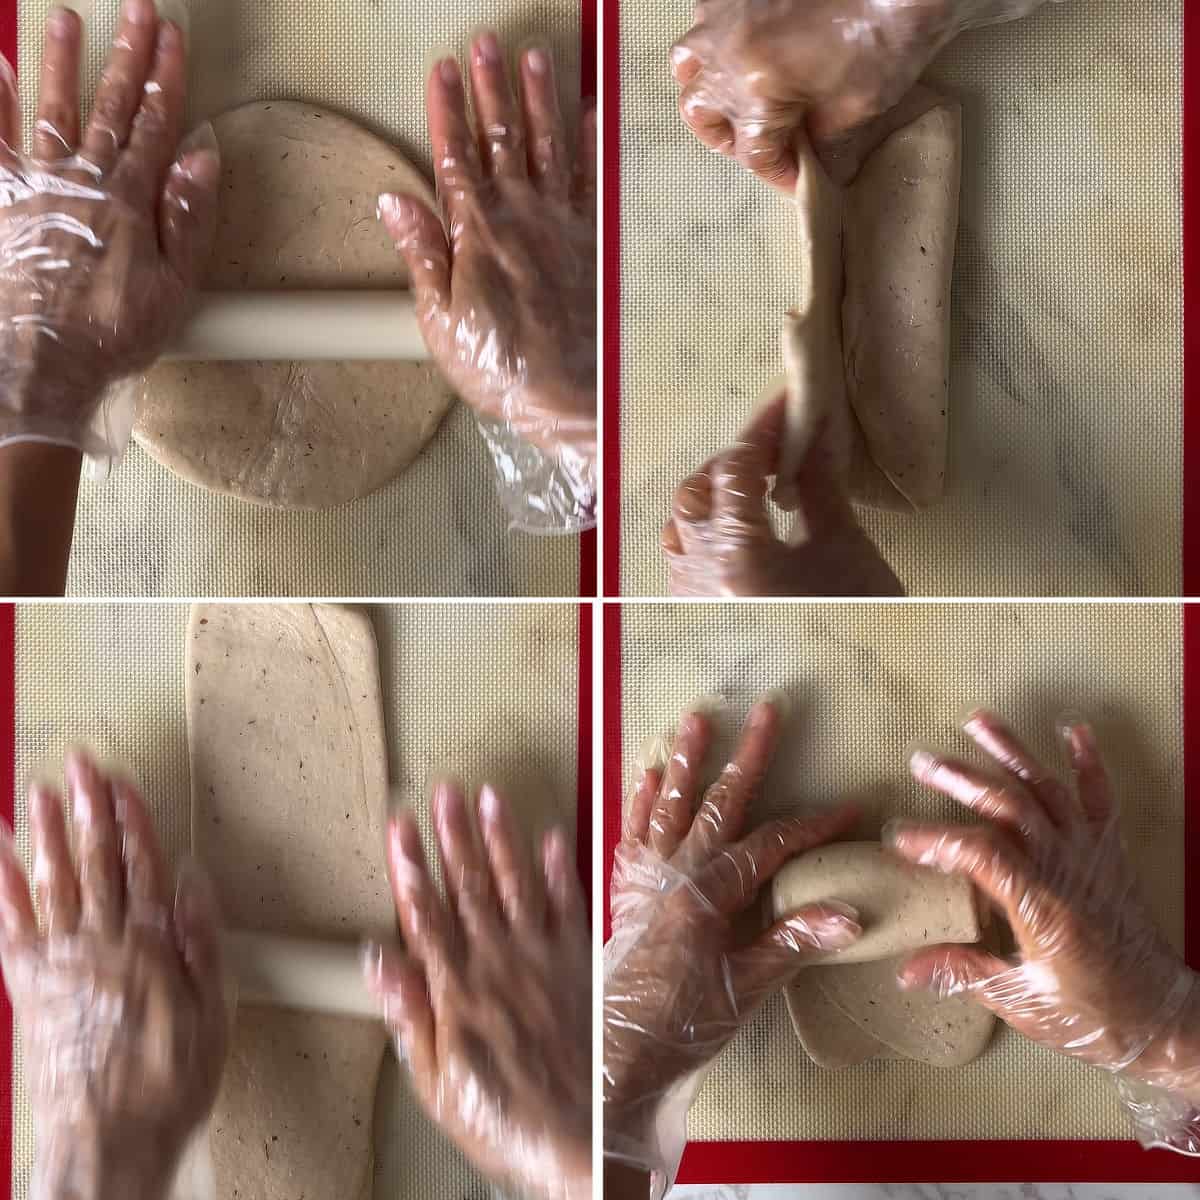
8. Shape into logs
Shape each ball into a log like so and place them into your loaf pan.
NOTE: You can also shape this into 1 big log if you don’t want to bother with dividing it into 3.
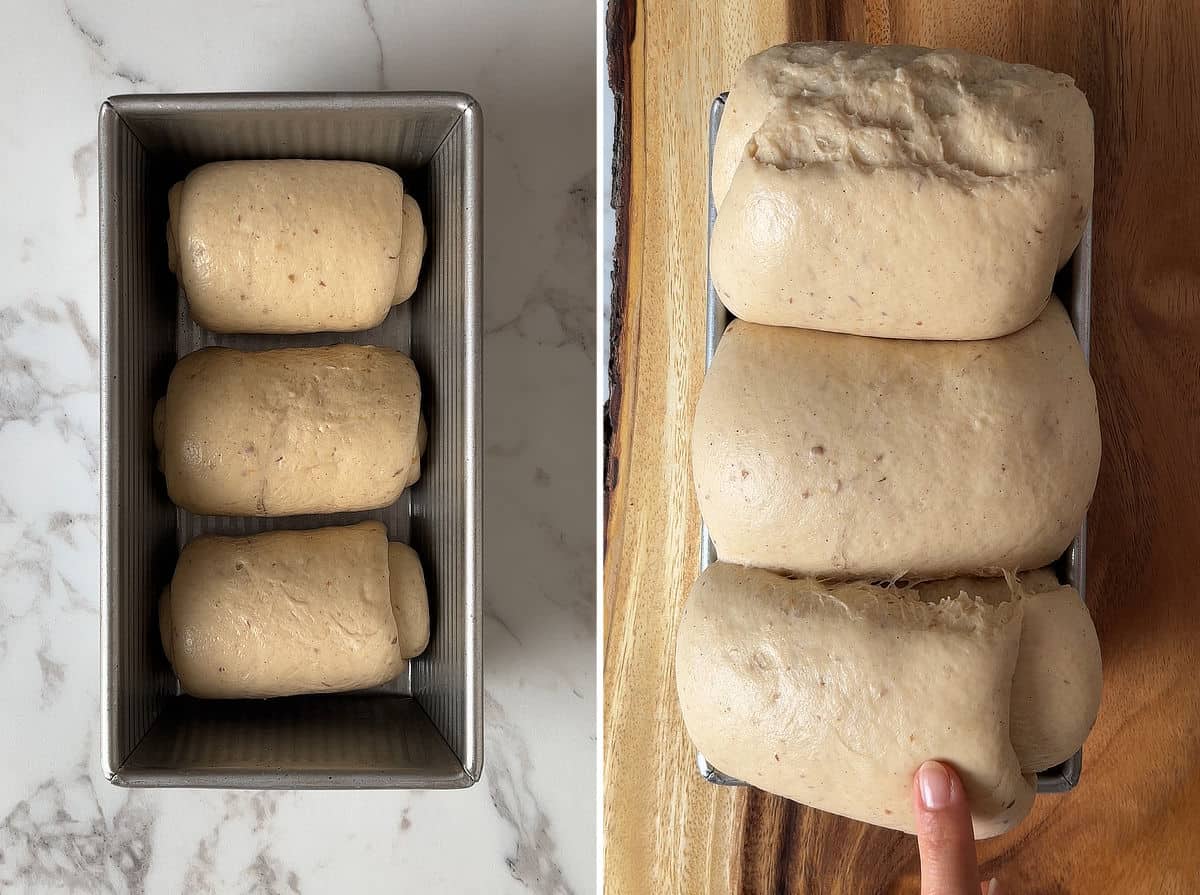
9. Proof the dough
Proof the dough for 7 to 8 hours. The dough is ready when it is very puffy, has risen well above the rim of the loaf pan, and a gentle press leaves an indentation that slowly springs back (but not immediately).
NOTE: Proofing time is highly dependent on temperature so make sure to pay attention to visual cues but for me, this dough takes longer to proof than my other milk breads.
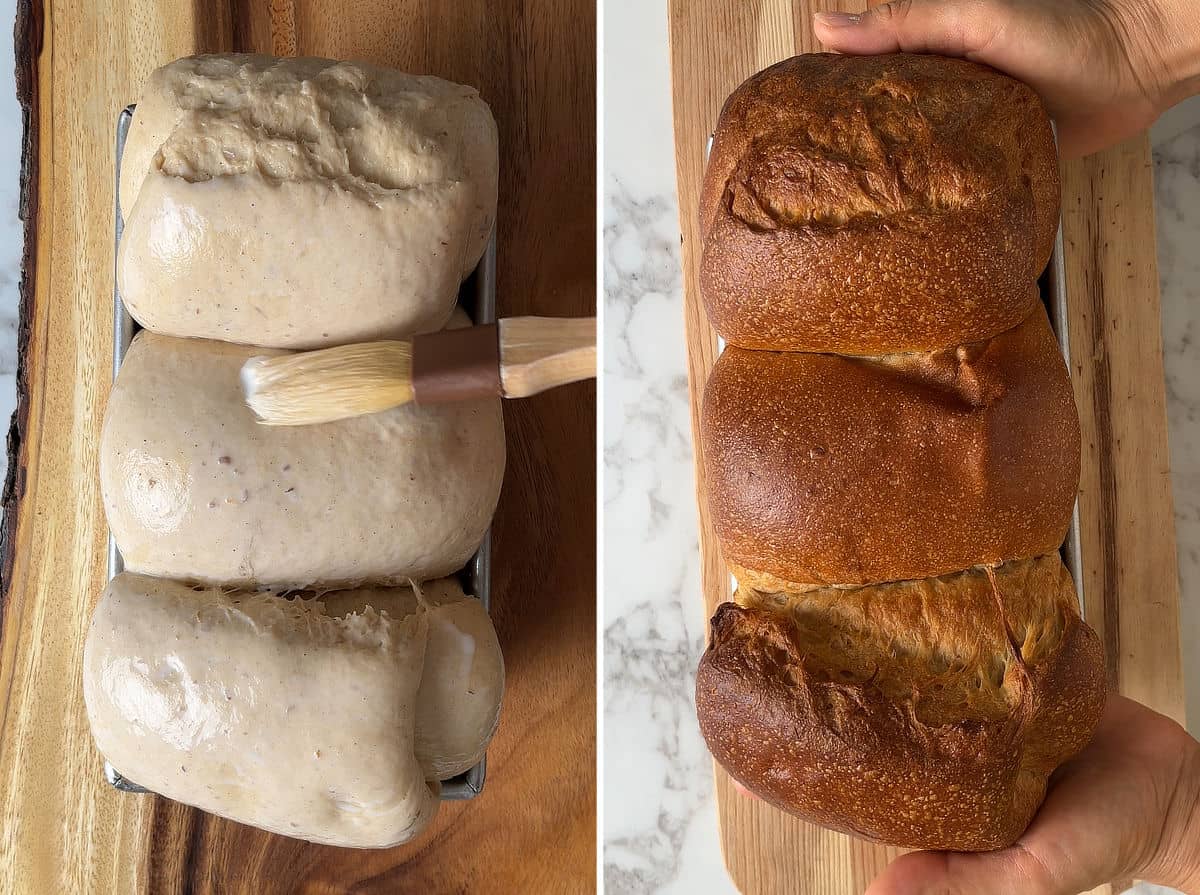
10. Bake
Brush milk generously over the surface of your dough and bake at 400°F (205°C) for 7 minutes, then reduce the temperature to 350°F (180°C) and bake for another 20 minutes. You want the internal temperature of your bread to reach 190 – 200°F. Let cool completely before cutting into it.
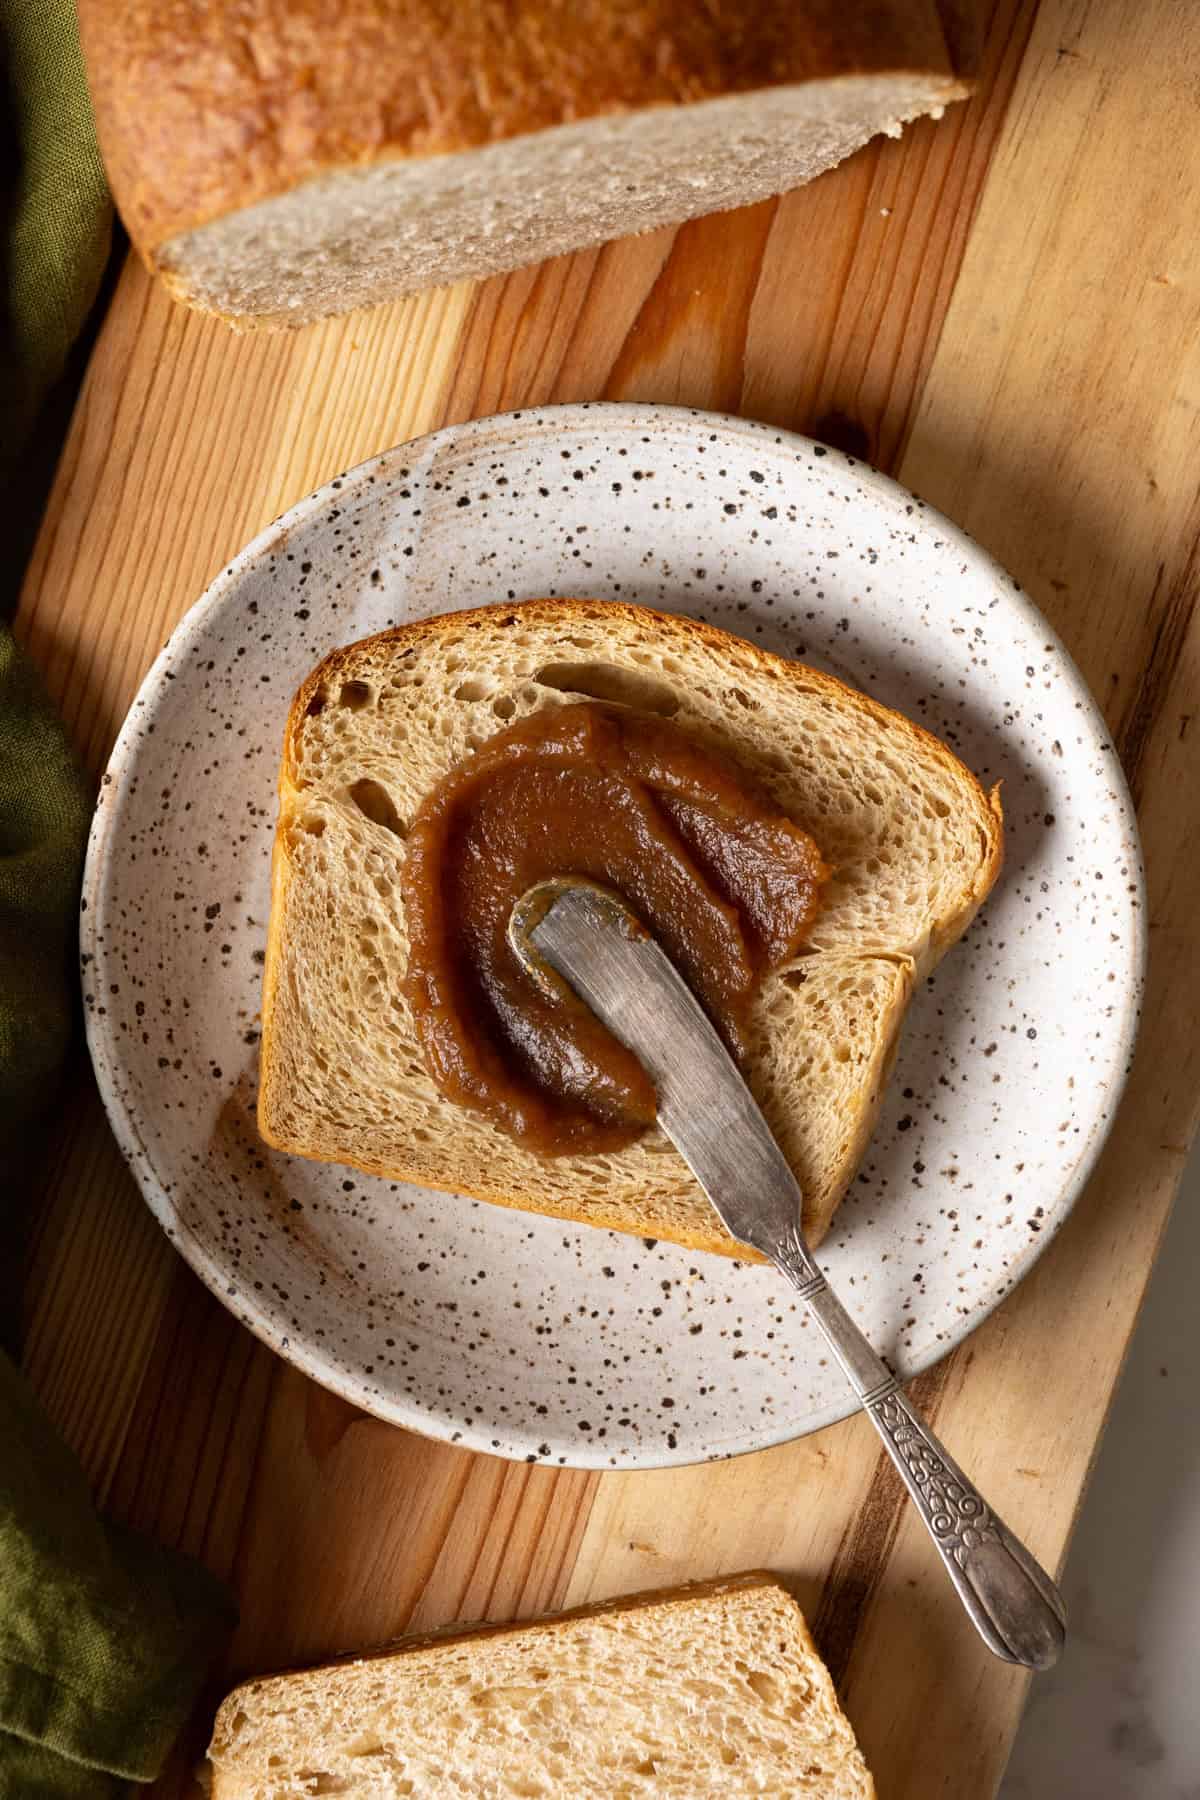
Did I say how good this apple butter sourdough bread is as toast? And that extra apple butter you’ve got, spread it on top! 👌
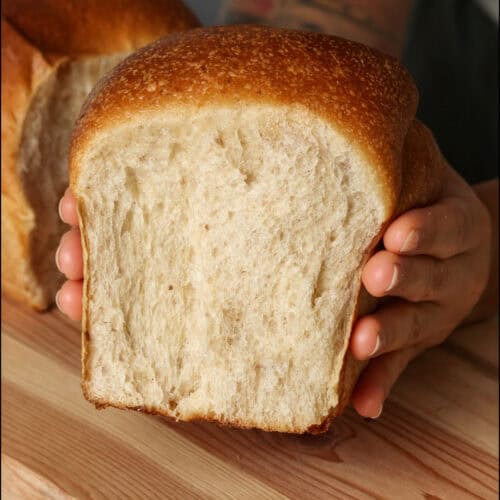
Apple Butter Sourdough Milk Bread
Equipment
- Kitchen scale
- Thermometer
- Stand Mixer
- Saucepan
- Spatulas
- Bowl scraper
- 1-pound loaf pan (8.5” x 4.5”)
- Silicone mat
- Vinyl gloves
Ingredients
Apple butter
- 6 apples cored and diced, about 2 lbs or 900 grams
- 50 grams brown sugar
- 1 tsp apple pie spice or cinnamon
- A large pinch of kosher salt
Apple butter sourdough starter
- 10 grams active sourdough starter
- 50 grams apple butter room temp
- 50 grams flour AP or bread both work
Bread dough
- 130 grams milk
- 30 grams brown sugar
- 55 grams unsalted butter sliced into thin pats
- 100 grams apple butter
- 280 grams flour AP or bread both work
- 6 grams kosher salt
- All of the apple butter starter
- Neutral oil for dough handling
- Extra milk or egg wash
Instructions
Day 1
- Make apple butter – Toss all the ingredients for apple butter in the slow cooker and cook on low, covered, for 4 – 6 hours until the apple is completely softened. Use an immersion blender to blend the mixture until smooth. Continue to cook on low, uncovered, for 1.5 – 2 hours longer until the apple butter thickens to your desired consistency and is glossy. Allow to cool.6 apples, 50 grams brown sugar, 1 tsp apple pie spice, A large pinch of kosher salt
- Make apple butter starter – Mix all the ingredients for your apple butter starter together in the evening and it should be ready to use within 12 hours.10 grams active sourdough starter, 50 grams apple butter, 50 grams flour
Day 2
- Prepare the liquid (8 am) – Heat the milk with brown sugar in a small saucepan over medium heat, stirring constantly, until the milk is simmering and the sugar has fully dissolved. Turn off the heat, add the sliced butter to the hot milk mixture, and stir until completely melted. Add to a stand mixer bowl and stir in the apple butter. Let it cool.130 grams milk, 30 grams brown sugar, 55 grams unsalted butter, 100 grams apple butter
- “Autolyse” (8:15 am) – Make sure your liquid mixture is between 80 – 90°F (27 – 32°C), add flour and salt to the cooled liquid mixture. Use a spatula to mix until all the liquid is absorbed. Cover and let rest for 15 – 20 minutes.280 grams flour, 6 grams kosher salt
- Knead the dough (8:35 am) – Add all of the apple butter starter to the “autolysed” dough. Knead with the dough hook on speed 2 for 20 minutes.All of the apple butter starter
- Continue bulk fermentation (9 am) – Oil your hands, a bowl scraper, and your clean countertop. You can use gloves and the silicone mat on your surface to further help prevent sticking. Scrape the dough out and shape it into a ball on the oiled surface. Lightly oil the mixing bowl, then return the dough to the bowl. Cover and place in a warm spot. You will perform 2 – 3 sets of stretch and fold at 45-minute intervals. Set a timer for 45 minutes.Neutral oil for dough handling
- Stretch and fold #1 (9:45 am) – With oiled hands, lift the dough from the center. It will stretch as you lift it up and out of the bowl. If it’s sticky, use your bowl scraper to help release it. Stretch the dough into a long strip and fold in thirds like you’re folding a letter. Turn it 90 degrees, stretch it out into a long strip again and fold in thirds. Place it seam-side down back into the mixing bowl, cover, and set the timer for another 45 minutes.
- Stretch and fold #2 (10:30 am) – Repeat the same process. At minimum, complete 2 sets if short on time.
- Stretch and fold #3 (11:15 am) – Repeat one final set. The dough should feel stronger and more elastic. It should also have risen a bit. Cover and let it finish bulk fermentation at room temp for another 2 – 3 hours.
- Divide (2:00 pm) – Using your bowl scraper, scrape the dough onto a lightly floured surface and divide into 3 portions. Roll each into a smooth ball. Cover and let rest for about 10-15 minutes.
- Shape (2:15 pm) – Take each dough ball, smooth side down, flatten with your hand or roll into a rectangle, fold into thirds like a letter. Flatten again and allow it to stretch lengthwise, but keep the width slightly narrower than your loaf pan. Roll up into a log and place into the loaf pan. At this point, you can continue proofing the dough and baking immediately (see the timeline in my post) or cover the pan and refrigerate the dough.
- Proof (11:00 pm) – Take the dough out of the fridge and proof overnight for 7 – 8 hours. I typically use a 15-quart storage bin as my proofing box. The dough is ready when it is very puffy, has risen well above the rim of the loaf pan, and a gentle press leaves an indentation that slowly springs back (but not immediately).
Day 3
- Preheat the oven (6:30 am) – Toward the end of proofing, preheat the oven to 400°F (205°C) for at least 30 minutes. If proofing in the oven, remove the dough before preheating.
- Bake (7:00 am) – Brush the top of the loaf and any exposed sides with extra milk or egg wash. Bake at 400°F (205°C) for 7 minutes, then reduce the temperature to 350°F (180°C) and bake for another 20 minutes. The top should be golden brown and the internal temperature should reach 190 – 200°F.Extra milk or egg wash
- Cool – Let your bread cool in the pan on a wire rack until just warm to the touch before removing it from the pan. Cool completely before slicing.
Notes
- You can make the apple butter the day before or make it well ahead of time. It will last in the refrigerator for several weeks. This batch of apple butter also makes way more than you’ll need for 1 loaf of bread. I was able to make 3 loaves from 1 batch of apple butter.
- Rising time and proofing time are highly dependent on temperature. So make sure you watch your dough and not the clock, use my timeline as a general gauge but pay attention to visual cues to ensure you don’t under or over proof your bread.
- I prefer using oil to prevent dough from sticking to my hand instead of extra flour to avoid adding too much flour to the dough risking a drier loaf.
- The timeline is a suggestion, feel free to modify it to fit your schedule.
- STORAGE: this loaf is good at room temp for a day or two but it is best stored in the fridge, it should last a couple of weeks. Or you can freeze it for up to 3 months.
Nutrition
Nutrition information is automatically calculated, so should only be used as an approximation.